Announcing Full Tessel Support!
We are happy to announce full support for the Tessel JavaScript microcontroller! The Tessel is a new JavaScript powered microcontroller which runs your JavaScript programs directly on the board, so there's no need for an external PC to control the board. It features 4 build in LEDs, 1 button, and 5 banks of GPIO ports, i2c, spi and uart.
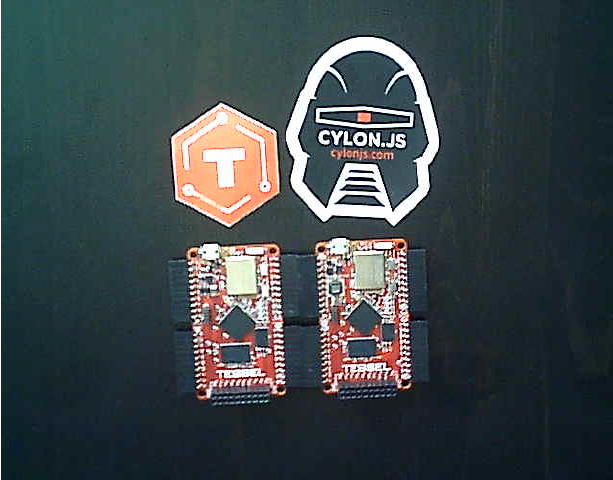
This picture of a Tessel & Cylon.js was taken from a Tessel using the Tessel Camera module, as controlled by Cylon.js itself. How meta!
Using Cylon.js on your Tessel gives you access to all of our existing GPIO and I2C driver support as well as the official Tessel Modules.
We currently support the following Modules:
- Accelerometer
- Ambient Light + Sound
- Audio
- Bluetooth Low Energy
- Camera
- Climate
- GPS
- Infrared
- Relay
- Servo
With more on the way!
Getting started with Cylon.js is as easy as:
- Follow the Tessel install instructions
$ npm install -g cylon-cli$ cylon generate tessel my-tessel-project$ cd my-tessel-project$ npm install$ tessel run blink.js
The supplied blink.js example uses the one of the Tessel's built-in LEDs.
var Cylon = require('cylon');

Cylon.robot({
  connections: {
    tessel: { adaptor: 'tessel' }
  },

  devices: {
    led: { driver: 'led', pin: 1 }
  },

  work: function(my) {
    every((1).seconds(), function() {
      my.led.toggle()
    });
  }
}).start();
Now for an example with user interaction! Here's a button example using the
built-in config button and a built-in LED. Copy this example into your
my-tessel-project directory as button.js
var Cylon = require('cylon');

Cylon.robot({
  connections: {
    tessel: { name: 'tessel', adaptor: 'tessel' }
  },

  devices: [
    { name: 'led', driver: 'led', pin: 1 },
    { name: 'button', driver: 'button' }
  ],

  work: function(my) {
    my.button.on('push', function() {
      my.led.toggle();
    });
  }
}).start();
And run with $ tessel run button.js. When you press the config button, the
light will toggle on and off, neat!
Now for something interesting. Here's an example using the built-in config
button, a built-in LED and the camera-vc0706 Camera module! Copy this
example into your my-tessel-project directory as camera.js
var Cylon = require('cylon');

Cylon.robot({
  connections: [
    { name: 'tessel', adaptor: 'tessel' },
    { name: 'tessel_A', adaptor: 'tessel', port: 'A' },
  ],
  devices: [
    { name: 'led', driver: 'led', pin: 1, connection: 'tessel' },
    { name: 'button', driver: 'button', connection: 'tessel' },
    { name: 'camera', driver: 'camera-vc0706', connection: 'tessel_A' },
  ],

  work: function(my) {
    my.camera.on('error', function (err) {
      console.log("Camera error: ", err);
    });

    my.camera.setCompression(0.4, function(err) {
      if (err) console.log("error setting compression: ", err);
    });

    my.button.on('push', function() {
      my.led.turnOn();
      my.camera.takePicture(function(err, image) {
        if (err) {
          console.log('error taking image', err);
        } else {
          // Name the image
          var name = 'picture-' + Math.floor(Date.now()*1000) + '.jpg';
          // Save the image
          console.log('Picture saving as', name, '...');
          process.sendfile(name, image);
        }
        my.led.turnOff();
      });
    });
  }
}).start();
This example will take a picture every time you press the config button
while the indicator LED will tell you when it's finished!
You can run this example with $ tessel run camera.js --upload-dir .
The --upload-dir . tells the Tessel to save the pictures to your current directory.
Cylon.js makes developing your Tessel applications easy and fun! Be sure to checkout our examples for each Tessel module here. As well as the 18 other different hardware platforms currently supported in Cylon.js.
Network


Posts
- Cylon.js Off And Rolling In 2016
- Cylon.js 1.2.0 - Logging and Timing and BLE! Oh my!
- Cylon.js 1.1.0 - The Big Cleanup
- Hello, Node Bebop Drone
- Cylon.js featured in Wired
- Cylon.js 1.0.0 is here!
- Using Socket.io With The Cylon.js API
- Cylon 0.22.0 - A New Year's Release
- Cylon 0.21.0 is out!
- Creating Multiplatform Precompiled Binaries for Node.js Modules
- Cylon 0.20.0 is out!
- Running Robots From Your Browser With Cylon.js
- Winning the Dreamforce 500 With Cylon.js
- With The New Cylon.js 0.19.0, You Can Be Fluent Too
- Cylon.js on Intel Edison
- Cylon Takes Off on NodeBots Day
- Cylon.js Fun With The Arduino Yun
- Control Robots From Your Pebble
- Making Moves With Intel Galileo
- The Cylon Nest
- Announcing Full Tessel Support!
- Cylon 0.15.0 is Out!
- Cylon.js in Make Magazine!
- Cylon.js At JSConf 2014
- Cylon.js Takes The Stage At MakerFaire
- Cylon.js In Scotland
- Robots Are The New Normal At NextBerlin
- Thingscon - Ich Bin Ein Cylon
- National Robotics Week at the Robotics Society of Southern California
- Functional Robots With Wisp
- Release 0.12 Is For RobotOps
- Making Waves At Makerland
- This One Goes To 0.11 Of Pure JavaScript
- Tipping SCaLE12X
- Intro Robeaux- A Universal User Interface To Robotic Devices
- ng-robots! A Fun Robot Hackathon At The First ng-conf
- Number 9! The Release In Which We Add A Web UX, More Platforms, and Tools
- Release 0.8.0 Makes 10 Platforms
- RobotsConf Was Remarkable
- Dreamforce Means Connected Devices Are A Thing
- Dreamforce Is Coming!
- Welcome, Cylon.js
