Cylon.js Off And Rolling In 2016
The new year is here, and we're off and rolling with our first Cylon.js releases of 2016.
There have been lots of exciting new developments in the hardware world, and our awesome contributors and team have been busy making things work for all of you.
Here's the list of this first collection of platform releases of the year.
Platform Updates
cylon-ble Support For Noble 1.3
We've added support in cylon-ble for the new 1.3.0 version of Noble. We've also greatly improved our integration and Noble connection sharing. This means you can more easily connect your Cylon.js programs to Bluetooth LE devices than ever before. Expect lots of cool integrations coming soon.
cylon-ollie is now cylon-sphero-ble
We've renamed the cylon-ollie module to cylon-sphero-ble, and we've also added support for a certain very popular little cinematic robot. Here is a code sample:
var Cylon = require('cylon');

Cylon.robot({
  connections: {
    bluetooth: { adaptor: 'central', uuid: 'cc360e85785e', module: 'cylon-ble'}
  },

  devices: {
    bb8: { driver: 'bb8', module: 'cylon-sphero-ble'}
  },

  work: function(my) {
    my.bb8.color(0x00FFFF);
    my.bb8.roll(60, 0);

    after(3000, function() {
      my.bb8.color(0xFF0000);
      my.bb8.stop();
    });
  }
}).start();
Thank you to our awesome friends at Sphero, and their support of the Sphero.js library.
cylon-audio using MPG123
We've released a new version of cylon-audio that uses the MPG123 library. This means a lot less dependencies, not to mention support for playing multiple sounds at the same time. We've even added a handy loop() function. Check it out at https://github.com/hybridgroup/cylon-audio
var Cylon = require("cylon");

Cylon.robot({
  connections: {
    audio: { adaptor: "audio" }
  },

  devices: {
    sound: { driver: "audio", file: "./audio_samples/audio-sample.mp3" }
  },

  work: function(my) {
    my.sound.loop();
  }
}).start();
cylon-joystick bugfixes
We fixed some bugs in cylon-joystick, and now the Dualshock 4 is fully working, including all the triggers. Fire at will, commander!
cylon-mqtt updates
We've updated cylon-mqtt to the latest version of mqtt.js, as well as adding some additional configuration options to more easily integrate with older MQTT servers.
cylon-intel-iot i2c error handling
We're released a new update to cylon-intel-iot that adds improved error handling for missing or disconnected i2c devices. Thank you @derrell for your contribution that fixes this!
cylon-gpio improved RGB LED support
Thanks to contributor @bencevans, the RGB LED support in cylon-gpio can more easily handle different types of RGB LEDs.
Thanks To Our Users and Contributors
Thank you very much to our users and contributors for their hard work making Cylon.js the best it can be. You could be the next of us, we cordially invite you to please jump right in! We appreciate every contribution.
For the latest news, be sure to follow us on Twitter at @CylonJS.

Cylon.js 1.2.0 - Logging and Timing and BLE! Oh my!
We've been really busy working on our JavaScript robotics & IoT framework, and version 1.2.0 of Cylon.js is hot off the presses.
There are several important changes to the Cylon.js core. There are also some significant changes to the cylon-ble module that provides support for various Bluetooth LE devices.
And of course, a smattering of other changes to some of the other Cylon.js modules. Let's get into the details.
Cylon.js Core Changes
We have made a few important and useful changes to the Cylon.js core:
Improved Time Helpers
We've added a couple more convenience functions for our expressive time syntax. You can now define increments of time in anything ranging from minutes to milliseconds.
Here are a few examples combined with the every, after, & finish functions:
after((500).milliseconds(), function() {
  console.log("500 milliseconds elapsed");
});

every((30).seconds(), function() {
  console.log("another 30 seconds");
});

var minutely = every((1).minute(), function() {
  console.log("another 1 minute");
});

after((10).minutes(), function() {
  finish(minutely);
  console.log("10 minutes elapsed");
});
Dynamic Connections And Devices
You no longer need to define all of your connections and devices upfront. Now you can dynamically add connections and devices, and start them up, after your Cylon.js robot is already running. Here is an example using a dynamic device:
var Cylon = require("cylon");

Cylon.robot({
  connections: {
    loopback: { adaptor: "loopback" }
  },

  connectPinger: function() {
    this.device("pinger",
                {connection: "loopback", driver: "ping"});
    this.startDevice(this.devices.pinger, function() {
      console.log("Get ready to ping...");
    });
  },

  work: function(my) {
    my.connectPinger();

    every((1).second(), function() {
      console.log(my.pinger.ping());
    });
  }
}).start();
This is an extremely simple example, but shows the idea. You could use external configuration files to determine which devices the user has installed, do connection discovery to decide which to use, and so many more possibilities.
Simplified Logging
We've replaced the built-in logger with a much simpler one. It still has the important options, but removes everything else. The Cylon.js logger is also pluggable, so it is very easy to replace it with your own logging capabilities should you so choose. This should not really impact developers unless they are implementing adaptor or driver modules.
cylon-ble Enhanced Features
Compatible With Noble 1.1.x
We've updated cylon-ble to work with the latest version of noble. Thanks to the hard work of @sandeepmistry and other contributors to noble, cylon-ble can now run on Linux, OSX and Windows 8.1+ too!
Multiple Connections
The latest release of cylon-ble now fully supports connections to multiple BLE peripherals at the same time. This makes it really easy to write code that coordinates activity between multiple, different kinds of Bluetooth LE devices.
Direct BLE Characteristic Driver
A new driver has been added to the cylon-ble module called characteristic. This is a suitably ubiquitous name, for what is a very useful driver.
The characteristic driver provides a simple generic interface to a single BLE service/characteristic. It is to BLE development in Cylon.js what the direct-pin driver is to GPIO development: a way to quickly connect to something, or to do exploratory development to figure out how a BLE device works.
Example usage:
var Cylon = require("cylon");

Cylon.robot({
  connections: {
    bluetooth: {
      adaptor: "central", uuid: "207377654321",
      module: "cylon-ble"
    }
  },

  devices: {
    wiced: {
      driver: "ble-characteristic",
      serviceId: "180f", characteristicId: "2a19",
      connection: "bluetooth"
    }
  },

  work: function(my) {
    my.wiced.readCharacteristic(function(err, data) {
      if (err) { return console.error("Error: ", err); }
      console.log("Data: ", data);
    });
  }
}).start();
This example connects and then reads the characteristic ID 2a19 for the service ID 180f. This happens to be the "Battery" information, which is a well-known BLE service/characteristic.
BLE Searching + Dynamic Peripherals
The new cylon-ble release also adds a new way to scan for BLE devices to connect to. You can combine this with the dynamic device feature. This makes it possible to search for devices at runtime, and then connect to whichever of them based on how you want your application to work.
Example usage:
var Cylon = require("cylon");

Cylon.robot({
  connections: {
    bluetooth: { adaptor: "central", module: "cylon-ble" }
  },

  connectBLE: function(peripheral) {
    if (this.connected) { return; }

    this.bluetooth.connectPeripheral(peripheral.uuid, peripheral, function() {
      console.log(peripheral.advertisement.localName, peripheral.uuid);
      this.connected = true;
      this.device("blething",
                  {connection: "bluetooth", driver: "ble-device-information"});
      this.startDevice(this.devices.blething, function() {
        this.devices.blething.getManufacturerName(function(err, data) {
          if (err) {
            console.log("error: ", err);
            return;
          }
          console.log("data: ", data);
        });
      }.bind(this));
    }.bind(this));
  },

  work: function(my) {
    this.connected = false;

    my.bluetooth.on("discover", function(peripheral) {
      my.connectBLE(peripheral);
    });
  }
}).start();
This example scans and then automatically connects to the first BLE peripheral it can find. Then it tries to obtain the manufacturer name via the device-information service.
A Few More Tidbits
cylon-joystick Support For Dualshock 4
We've added support for the new Dualshock 4, which is the new joystick from the Playstation 4. This coincidentally brings the total number of different supported joysticks to 4.
cylon-gpio Bugfixes
A couple small but important fixes to the continuous-servo driver thanks to contributor Eric Terpstra.
cylon-mqtt Update And Additional Options
We've updated the cylon-mqtt adaptor to the latest mqtt.js which is maintained by @matteocollina, well known as the JavaScript community's M2M guru. This picks up various speed enhancements and security fixes.
We also added some additional options for configuration. This allows support for authentication options for cloud-based MQTT providers such as IBM Bluemix.
Thank You, Users and Contributors
As always, we want to thank our users and contributors for their fine efforts that have led to this release. You could be the next human to join in!
For more updates, be sure to follow us on Twitter at @CylonJS.
Cylon.js 1.1.0 - The Big Cleanup
Cylon.js 1.1.0 has just been released, and from the external interfaces it appears only a few small changes and additions. However, the internals have had a fairly sizable refactoring, meriting a release. There is a small potential for backwards compatability issues for users making use of undocumented properties on the main Cylon.js exports object.
Here's a overview of the changes, but if you want to see more check out the compare view on GitHub.
-
ESLint - we've switched to using ESLint for linting, over JSHint. ESLint's better support for validating coding styles and conventions has been a great asset to us. This has also resulted in a number of fixes to prevent potential minor issues in core.
-
async - we've removed Cylon's last remaining core dependency,
async. This has the benefit of reducing Cylon install sizes across projects. -
MCP refactor - we've split apart the existing
lib/cylon.jsexports module into three new files, for better separation of responsibilities. This may result in some backwards compatability concerns if you were previously using undocumented properties on the main Cylon object, such asCylon.robots, theCylon.toJSONmethod, orCylon.apiInstances. For more details, see the pull request diff. -
Robot Naming - previously, robot names were generated pseudo-randomly if the user didn't explicitly supply one. While this helped avoid collisions, it led to confusion when Cylon programs were restarted, as Robots couldn't be found under the same name. In Cylon 1.1.0, un-named robots are now assigned an incremental name, e.g. "Robot 1", "Robot 2", etc.
-
Better validation - we've improved validation of Robot options, to provide better clues as to what's preventing your robot from working. We now better check for invalid syntax that would possibly result in an obscure error, ensuring that a better response is generated. Also, we now provide a useful warning message when multiple connections exist, and devices are specified without an explicit connection.
-
Contribution Guidelines and CoC - We've added a more explicit set of contribution guidelines, based on the iojs guidelines. Additionally, we've outlined a Code of Conduct, adapted from Rust's CoC guidelines.
Even More Hardware Support
Of course, it wouldn't be a Cylon.js release without new or enhanced platform support, and we've got a bunch!
We've now added improved flight and video support for the Parrot Bebop drone.
We've also updated our support for Nest, to fully cover the Nest Protect, Nest Home, and Nest Thermostat.
Additionally, we've fixed compilation issues for a few of our modules that had issues on newer versions of V8. cylon-joystick and cylon-digispark should now work fully on Node v0.12 and iojs. All the future nodes belong to us!
And last, but certainly not least, we've also updated cylon-sphero to use the new Sphero.js library from Orbotix.
For the latest updates, be sure to follow us on Twitter at @CylonJS.
Hello, Node Bebop Drone
We love drones, and we've had our brand new Parrot Bebop for a little while. However, we did not have any way to control Parrot's new "high-end" consumer drone using JavaScript.
Without further ado, introducing node-bebop, a node module to control the Parrot Bebop quadcopter.
There are already so many wonderful JavaScript code examples out there for the ARDrone, thanks to the fine efforts of the NodeCopter crew.
Our objective was to be able to use the Parrot Bebop with code compatible with NodeCopter. And we wanted to do this, despite the Bebop having an entirely new API, one which is incompatible with the ARDrone, despite both of them being WiFi devices.
So we created node-bebop using a very similar outward-facing API as that pioneered by the NodeCopter team, but calling the new Bebop API within our implementation.
Here is an example of using node-bebop:
var bebop = require('node-bebop');

var drone = bebop.createClient();

drone.connect(function() {
  drone.takeOff();

  setTimeout(function() {
    drone.land();
  }, 5000);
});
This code should look very familiar to any of the thousands of people who attended a NodeCopter event.
Most of the flight commands have already been implemented. In addition, node-bebop can receive basic navigation data, and streaming video data.
In parallel to all of our efforts, @voodootikigod aka Chris Williams has been rallying the forks of node-rolling-spider, a JavaScript module for Parrot's OTHER new drone, the $99 Rolling Spider, into a 1.0 release. The API of the node-rolling-spider project is also "NodeCopter-compatible", and has its own rapidly growing community. Much of their example code will likely work with node-bebop as well.
We have cylon-bebop too
We have also created cylon-bebop as a wrapper around node-bebop, so you can control the Bebop using Cylon.js if you so prefer.
Here is an example that uses cylon-bebop along with cylon-joystick, to control a Bebop using a Dualshock 3 controller:
var cylon = require("cylon");

cylon.robot({
  connections: {
    joystick: { adaptor: "joystick" },
    bebop:  { adaptor: 'bebop' }
  },
  devices: {
    controller: { driver: "dualshock-3", connection: "joystick" },
    drone:      { driver: "bebop", connection: "bebop" }
  },
  work: function() {
    var that = this,
        rightStick = { x: 0.0, y: 0.0 },
        leftStick = { x: 0.0, y: 0.0 };

    that.controller.on("square:press", function() {
      that.drone.takeOff();
    });

    that.controller.on("triangle:press", function() {
      that.drone.stop();
    });

    that.controller.on("x:press", function() {
      that.drone.land();
    });

    that.controller.on("right_x:move", function(data) {
      rightStick.x = data;
    });

    that.controller.on("right_y:move", function(data) {
      rightStick.y = data;
    });

    that.controller.on("left_x:move", function(data) {
      leftStick.x = data;
    });

    that.controller.on("left_y:move", function(data) {
      leftStick.y = data;
    });

    setInterval(function() {
      var pair = leftStick;

      if (pair.y < 0) {
        that.drone.forward(validatePitch(pair.y));
      } else if (pair.y > 0) {
        that.drone.backward(validatePitch(pair.y));
      }

      if (pair.x > 0) {
        that.drone.right(validatePitch(pair.x));
      } else if (pair.x < 0) {
        that.drone.left(validatePitch(pair.x));
      }
    }, 0);

    setInterval(function() {
      var pair = rightStick;

      if (pair.y < 0) {
        that.drone.up(validatePitch(pair.y));
      } else if (pair.y > 0) {
        that.drone.down(validatePitch(pair.y));
      }

      if (pair.x > 0) {
        that.drone.clockwise(validatePitch(pair.x));
      } else if (pair.x < 0) {
        that.drone.counterClockwise(validatePitch(pair.x));
      }
    }, 0);

    setInterval(function() {
      that.drone.stop();
    }, 10);
  }
}).start();

function validatePitch(data) {
  var value = Math.abs(data);
  if (value >= 0.1) {
    if (value <= 1.0) {
      return Math.round(value * 100);
    } else {
      return 100;
    }
  } else {
    return 0;
  }
}
Conclusion
The Parrot Bebop is a very cool new drone, and we're happy to offer up node-bebop and cylon-bebop so you can take flight using JavaScript at the controls.
Please follow us on Twitter at @CylonJS to receive updates as we continue to work on JavaScript-powered drones, robots, and connected devices.
Cylon.js featured in Wired
The Hybrid Group's own Ringleader Ron Evans got to speak with Wired about the Internet of Things and open source robotics. The interview covers our robotics frameworks Cylon.js, Artoo, and Gobot, as well as what direction we see them moving towards in the future.
Evans also went into detail about his experiences working on Apple's program Hypercard, and how that open source mentality went on to influence The Hybrid Group's other projects such as KidsRuby later on. Read the full article titled "Internet of Anything: Simple Tools Make It Possible for Anyone to Hack Robots" here.
Cylon.js 1.0.0 is here!
It's been a long time coming, but version 1.0.0 of Cylon.js is finally here!
We're thrilled to share this with all of you.
If you want a "media-friendly" version of the story, here is our press release about it: http://cylonjs.com/news/cylon-1.0-release
This release signifies we think the core APIs in Cylon are stable, and we don't anticipate any more breaking changes in the near future.
In addition, we have made a number of important changes:
Removed Single Connection/Device Syntax
The outdated, deprecated method of specifying a single device or connection when creating a robot has now been fully removed.
Attempting to instantiate a robot in this manner will now throw an error.
Bound Functions By Default
Methods passed to the robot initializer are now auto-bound:
Cylon.robot({
  connections: {
    arduino: { adaptor: "firmata", port: "/dev/ttyACM0" }
  },

  devices: {
    led: { driver: "led", pin: 13 }
  },

  blink: function() {
    this.led.toggle();
  },

  work: function(my) {
    every((1).second(), my.blink);
  }
}).start();
Basestar#respond
A new method has been added to the base class for Drivers and Adaptors, #respond.
This method provides a simple interface for device/adaptor methods to handle both callbacks and events.
It's signature is #respond(event, callback, err, ...vals).
The error/values are provided to the callback directly.
If err is a non-null value, the "error" event is emitted with err provided as a value.
Otherwise, the provided event is emitted, with vals passed as arguments.
Example usage:
Driver.prototype.write = function(pin, val, callback) {
  doAsyncThing(pin, val, function(err, data) {
    this.respond("write", callback, err, data);
  }.bind(this));
}
Debug mode flag
This release also adds a quicker way to run your robots in debug logging mode - just add the --debug flag to your command when running it.
As always, you can check out the compare view on GitHub for more details.
Contributors
We'd really like to extend a massive thanks to all the contributors who've helped get Cylon.js to this point. We couldn't have done this without you.
- Adrian Zankich
- Andrew Nesbitt
- Andrew Stewart
- Avner Cohen
- Caleb Oller
- Chris Boette
- Chris Matthieu
- Daniel Fischer
- Daniel Lamb
- Daniel Portales
- Edgar Silva
- Evoliofly
- Felix
- Fábio Franco Uechi
- Guido García
- James Brown
- Janaka Abeywardhana
- Jarrod Ribble
- Jasson Cascante
- Jasson Qasqant
- Javier Cervantes
- Jay Wengrow
- Jérôme Loï
- Julian Cheal
- Justin Smith
- Kraig Walker
- Loren West
- Luis Felipe Perez
- Mario Ricalde
- Matheus Mariano
- Michael Harris
- Mike Skalnik
- Nathan Zankich
- Rafael Magana
- Reid Carlberg
- Ron Evans
- Sonic Radish
- Theron Boerner
- Tomasz Szymanski
- Wojtek Erbetowski
- Xixe Bombilla
- chrisfp
- gorhgorh
- peterainbow
Thanks Again
We can't overstate how thankful we are to our users and contributors.
For more updates, be sure to follow us on Twitter at @CylonJS.
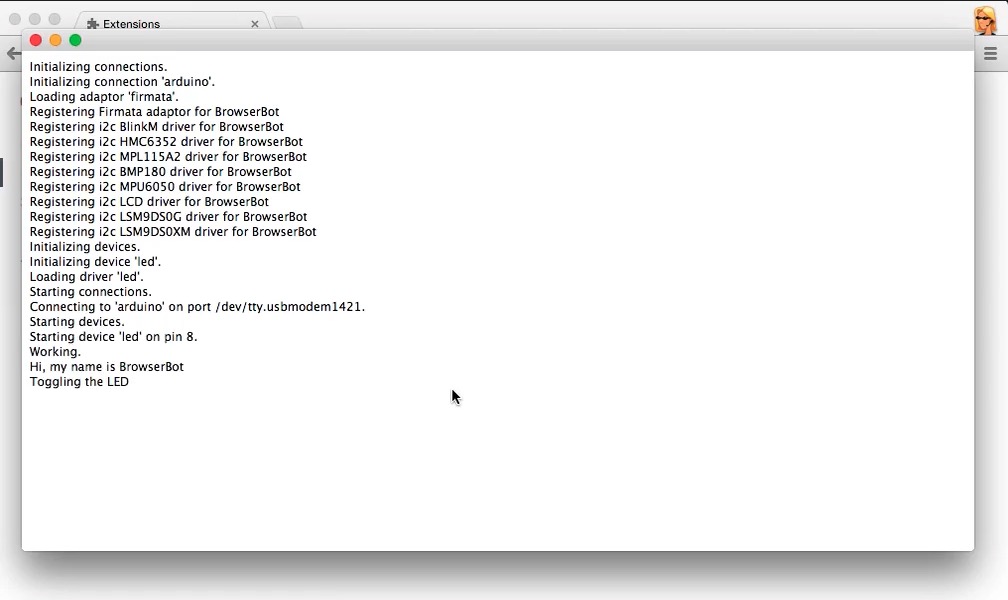
Using Socket.io With The Cylon.js API
In the latest release of Cylon.js, we made a big change to how the built-in API was implemented: we removed the API from the core Cylon.js module. Instead, we have implemented a simple plug-in system for API modules. This gives several advantages, like a smaller file size for the base cylon module if you do not need the API. It also allows you to only use the interfaces you actually need.
We currently have two different API plugins to choose from, cylon-api-http and cylon-api-socketio. The "http/https" API plugin is used to service REST-style API calls into Cylon.js, as well as supporting the Robeaux web user interface.
The newest API plugin, and what this post is about, is cylon-api-socketio, which as the name suggests adds support for the socket.io module. This makes it easy to command or retrieve data from a Cylon.js robot, simply by using a socket.io client such as a browser-based application.
Installation
First, you must make sure everything is installed. This is pretty simple. As with any other Cylon.js module,
you first install cylon. Then install cylon-api-socketio, like this:
$ npm install cylon cylon-api-socketio
Creating The Robot and Setting Up The API
We declare our robot as usual using Cylon.js. Once this is done we can add our Cylon.api() call in our code, and then
finally we start the work.
blink-server.js
'use strict';

// We require cylon and define our robot as usual
var Cylon = require('cylon');

Cylon.robot({
  name: 'chappie',

  connections: {
    arduino: { adaptor: 'firmata', port: '/dev/ttyACM0' }
  },

  devices: {
    led: { driver: 'led', pin: 13 }
  },

  work: function() {
    // Add your robot code here,
    // for this example with socket.io
    // we are going to be interacting
    // with the robot using the code in
    // the client side.
  }
});

// We setup the api specifying `socketio`
// as the preffered plugin
Cylon.api(
  'socketio',
  {
  host: '0.0.0.0',
  port: '3000'
});

Cylon.start()
The example above would be our "server" side program, which is in charge of handling all of the API socket connections. It creates and sets up the appropriate socket.io server listener. Once a user connects to the main Cylon.js socket, it creates sockets for the robots and devices, and sets up the appropriate routes, namespaces and listeners. Once you have connected, issuing commands and listening for events is pretty easy.
Connecting To A Socket and Sending Commands
In the following example, we will connect to the robot defined above, and then make an LED blink by sending a command to the led device from a client running in the browser.
First, run the blink-server program and wait for the work block to start. Then save the following html code in a file (blink-client.html) and open it in a browser:
blink-client.js
<!doctype html>
<html>
  <meta charset="utf-8">
  <head>
    <title>Socket.IO chat</title>
    <style>
      * { margin: 0; padding: 0; box-sizing: border-box; }
      body { font: 13px Helvetica, Arial; }
      form {
        background: #000; padding: 3px; position: fixed;
        bottom: 0; width: 100%;
      }
      form input {
        border: 0; padding: 10px; width: 90%;
        margin-right: .5%;
      }
      form button {
          width: 9%; background: rgb(130, 224, 255);
          border: none; padding: 10px;
      }
      #messages { list-style-type: none; margin: 0; padding: 0; }
      #messages li { padding: 5px 10px; }
      #messages li:nth-child(odd) { background: #eee; }
    </style>
  </head>
  <script src="https://cdn.socket.io/socket.io-1.2.0.js"></script>
  <script src="http://code.jquery.com/jquery-1.11.1.js"></script>
  <script type="text/javascript">
    var device;

    window.onload = function() {
      // We connect to the device defined in the robot
      device = io('http://127.0.0.1:3000/api/robots/chappie/devices/led');

      // Listen to the 'message' event on device
      device.on('message', function(msg) {
        $('#messages').append($('<li>').text(msg));
      });

      // The "hello world" program of robotics, the
      // blink and LED program, we just emit the command
      // we want our device to execute.
      setInterval(function() {
        device.emit('toggle');
      }, 1000);

      msg = 'You have been subscribed to Cylon socket: ' + device.nsp;

      $('#messages').append($('<li>').text(msg));

      $('form').submit(function(){
        device.emit('message', $('#m').val());
        $('#m').val('');

        return false;
      });
    };
  </script>
  <body>
    <ul id="messages"></ul>
    <form action="">
      <input id="m" autocomplete="off" /><button>Send</button>
    </form>
  </body>
</html>
You should see the built-in LED in your Arduino start blinking. The commands to tell the LED to blink, are all being sent from the browser to the robot, using the device socket we created and then calling device.emit('toggle');.
This is the especially interesting part right here:
device = io('http://127.0.0.1:3000/api/robots/chappie/devices/led');
Even though we are using a socket, we are using the same routing path style as we would use for the RESTful API call, following the Common Protocol for Programming Physical I/O standard.
By following this format for our "routes", all of the device commands and events you can use in a regular Cylon.js program are available to clients thanks to cylon-api-socket. Now, let's learn how to listen for events.
Listening For Robot Or Device Events In A Socket
We'll dial up the complexity a little bit, by using custom robot commands and events. It is worth mentioning that you can listen to any device-emitted event in the same fashion, but by connecting to the device socket instead.
As with the previous example, we start by defining our robot and setting up the Socket.io API. Here's how we add the custom commands and events:
robot-events-server.js
'use strict';

var Cylon = require('cylon');

Cylon.robot({
  name: 'chappie',

  // This is how we define custom events that will be registered
  // by the API.
  events: ['turned_on', 'turned_off'],

  // These are the commands that will be availble in the API
  // Commands method needs to return an object with the aliases
  // to the robot methods.
  commands: function() {
    return {
      turn_on: this.turnOn,
      turn_off: this.turnOff,
      toggle: this.toggle
    };
  },

  connections: {
    arduino: { adaptor: 'firmata', port: '/dev/ttyACM0' }
  },

  devices: {
    led: { driver: 'led', pin: 13 }
  },

  work: function() {
    // We setup two time outs to turn on
    // and turn off the led device.
    // this will trigger an event that
    // we'll to listen to in the client
    after((2).seconds(), function() {
      this.turnOn();
    }.bind(this));

    after((5).seconds(), function() {
      this.turnOff();
    }.bind(this));
  },

  turnOn: function() {
    this.led.turnOn();
    this.emit('turned_on');
  },

  turnOff: function() {
    this.led.turnOff();
    this.emit('turned_off');
  },

  toggle: function() {
    this.led.toggle();
    if (this.led.isOn()) {
      this.emit('turned_on');
    } else {
      this.emit('turned_off');
    }
  }
});

Cylon.api(
  'socketio',
  {
  host: '0.0.0.0',
  port: '3000'
});

Cylon.start();
Let's go over the code above. First, we define a new robot and add events to it. The API plugin will register listeners for these events.
Then we define custom commands that will be available to the API. As you can see, defining commands is slightly different, but this is for a good reason. This way you can create aliases for your robot methods more easily. You can also just define methods in your robot and omit the commands definition, in
which case all of the methods added to the robot would be available to the API. We prefer this more explicit way of doing it, which gives you more control over what you are exposing to the API.
Now, let's take a look at the client side of this example:
robot-events-client.js
<!doctype html>
<html>
  <meta charset="utf-8">
  <head>
    <title>Socket.IO chat</title>
    <style>
      * { margin: 0; padding: 0; box-sizing: border-box; }
      body { font: 13px Helvetica, Arial; }
      form { background: #000; padding: 3px;
        position: fixed; bottom: 0; width: 100%; }
      form input { border: 0; padding: 10px; width: 90%;
        margin-right: .5%; }
      form button { width: 9%; background: rgb(130, 224, 255);
        border: none; padding: 10px; }
      #messages { list-style-type: none; margin: 0; padding: 0; }
      #messages li { padding: 5px 10px; }
      #messages li:nth-child(odd) { background: #eee; }
    </style>
  </head>
  <script src="https://cdn.socket.io/socket.io-1.2.0.js"></script>
  <script src="http://code.jquery.com/jquery-1.11.1.js"></script>
  <script type="text/javascript">
    var robot;

    window.onload = function() {
      // We connect to the 'chappie' robot using its namespace(nsp)
      robot = io('http://127.0.0.1:3000/api/robots/chappie');

      // Listen to the 'message' event on the robot
      robot.on('message', function(msg) {
        $('#messages').append($('<li>').text(msg));
      });

      // Listen for robot specific events, this must be declared
      // when defining a robot in cylon
      robot.on('turned_on', function(){
        console.log('The robot "chappie" just turned ON its led!!!');
      });

      robot.on('turned_off', function(){
        console.log('The robot "chappie" just turned OFF its led!!!');
      });

      // The "hello world" program of robotics, the
      // blink and LED program, we accomplish this just
      // by emitting the command we want our robot to execute
      setInterval(function() {
        robot.emit('toggle');
      }, 1000);

      msg = 'You have been subscribed to Cylon sockets:' + robot.nsp;

      $('#messages').append($('<li>').text(msg));

      $('form').submit(function(){
        robot.emit('message', $('#m').val());
        $('#m').val('');

        return false;
      });
    };
  </script>
  <body>
    <ul id="messages"></ul>
    <form action="">
      <input id="m" autocomplete="off" /><button>Send</button>
    </form>
  </body>
</html>
In the above example, we start by connecting to the robot namespace. In Cylon.js all of out API routes (or API namespaces, in this case) start at the /api level. From there we can connect to a specific robot, simply by providing the robot's entire namespace, in this case /api/robots/chappie.
We then add a couple of listeners. First, one for the default message event that you can use to check socket connectivity to the robot. Then two more for the two custom events that we defined in our robot-events-server program.
Finally we setup a time interval to make the LED blink, but in this case we are do it by calling/sending one of the custom commands we defined in the robot.
Conclusion
As you can see, the possibilities for what you can do with this are enormous! You could add sensors to your robot and monitor in real-time, fly a drone from your browser, or connect to one robot, then trigger functionality in another robot, based on real-time sensor data, just to name a few.
We hope you find this blog post on how to use Socket.io with Cylon.js useful, and don't forget to check our API docs for more detailed information.
We have now made it easy to implement new interfaces, just by adding new API plugins. Be sure to follow us on Twitter at @CylonJS to receive updates as we implement new ways to communicate with Cylon.js.
UPDATED 2/5/15: Added info about how cylon-api-socketio follows the CPPP.IO standard
Cylon 0.22.0 - A New Year's Release
Happy New Year, everyone! We hope you had an amazing holiday season.
This release of Cylon.JS is focused on slimming down core and stabilizing some features.
As always, you can check out the compare view on GitHub.
Updates for Application Developers
-
New
devicesyntax: - to simplify associations between devices and connections, and to support some upcoming projects, the following syntax is now valid:// these are equivalent Cylon.robot({ connections: { leap: { adaptor: 'leapmotion' }, arduino: { adaptor: 'firmata', port: '/dev/ttyACM0' } }, devices: { led: { driver: 'led', pin: 13, connection: 'arduino' }, button: { driver: 'button', pin: 9, connection: 'arduino' } } }); Cylon.robot({ connections: { leap: { adaptor: 'leapmotion' }, arduino: { adaptor: 'firmata', port: '/dev/ttyACM0', devices: { led: { driver: 'led', pin: 13 }, button: { driver: 'button', pin: 9 } } } } });
-
API no longer installed by default:: - Cylon's built-in API has been extracted out into the cylon-api-http plugin. We think this is a better fit for most users, since it dramatically reduces the number of dependencies Cylon has. This also opens up support for additional Cylon API plugins down the road.
-
Smaller install: - The removal of the API, combined with a few other changes, dramatically slims down the size of a Cylon.JS install.
Our absolutely un-scientific estimates show a size drop of several megabytes, from 4.1MB down to 320kb.
This space savings is cumulative, as
cylon-*modules also include their own version of Cylon for internal use. It also makes it easier to install Cylon on smaller hardware devices with less storage.
Updates For Platform Developers
- JSHint: - we've added stricter JSHint rules to the Cylon repos, along with CI enforcement. This should help enforce code quality in the future, and catch more obvious bugs before they make it into a release.
New Platform Support
Of course, any Cylon.js release would not be complete without some new and enhanced platform support. Since our last release, we've added support for the Electric Imp (cylon-imp), we've updated our support for AT&T's M2X to support their 2.0 release (cylon-m2x), and we've just added support for Intel's IoT Analytics (cylon-intel-iot-analytics). We will talk about the latter in more detail in an upcoming post.
This is going to be an exciting year for us! For the latest updates, be sure to follow us on Twitter at @CylonJS.
Cylon 0.21.0 is out!
Just in time for RobotsConf, we've released Cylon 0.21.0!
This release focuses on stability and simplifying some long-standing architecture concerns.
As always, you can check out the compare view on GitHub.
Updates For Application Developers
-
New
connections/devicessyntax: - we've updated the syntax for how multiple devices or connections are specified in Cylon.js. This new object-based syntax makes it more straightforward to specify many connections or devices. The existing array syntax, as well as the single-objectdevice/connectionsyntax, is deprecated, and will be removed in 1.0.0. Here's a comparison of the two:// previous syntax, now deprecated: Cylon.robot({ connections: [ { name: 'arduino', adaptor: 'firmata', port: '/dev/ttyACM0' }, { name: 'leap', adaptor: 'leapmotion' } ], devices: [ { name: 'led', driver: 'led', pin: 13, connection: 'arduino' }, { name: 'button', driver: 'button', pin: 9, connection: 'arduino' } ] }); // new object-based syntax: Cylon.robot({ connections: { arduino: { adaptor: 'firmata', port: '/dev/ttyACM0' }, leap: { adaptor: 'leapmotion' } }, devices: { led: { driver: 'led', pin: 13, connection: 'arduino' }, button: { driver: 'button', pin: 9, connection: 'arduino' } } });
-
Fluent syntax updates - we've updated our fluent JS syntax a bit, adding
#deviceand#connectionmethods to help make it easier to set up robots. Here's a comparison:// declarative syntax: Cylon.robot({ connections: { arduino: { adaptor: 'firmata', port: '/dev/ttyACM0' } }, devices: { led: { driver: 'led', pin: 13 } }, work: function(my) { every((1).second(), my.led.toggle); } }).start(); // fluent syntax Cylon .robot() .connection('arduino', { adaptor: 'firmata', port: '/dev/ttyACM0' }) .device('led', { driver: 'led', pin: 13 }) .on('ready', function(bot) { setInterval(bot.led.toggle, 1000); }); Cylon.start();
Updates For Platform Developers
-
No more Connection/Device class: - Cylon's internal 'Connection' and 'Device' classes are no more. Now, when a user adds a Connection or Device to their robot, they're getting a direct instance of an Adaptor/Driver. For the most part, this shouldn't result in issues, but if you're doing manual method proxying you may have issues. These are the requisite changes to sub-modules:
- in Adaptor subclasses, instead of referencing
this.connection, just referencethis. - in Driver subclasses, instead of referencing
this.device, just referencethis. - in Driver subclasses,
this.connectionis now an Adaptor instance, not a Connection instance.
- in Adaptor subclasses, instead of referencing
Ollie Up at RobotsConf!
Every Cylon.js release adds some new hardware support, and this time we've added cylon-ollie with early support for the new Ollie robot from our friends at Orbotix. We're bringing some to RobotsConf for people to play with.
Look for our "preview" blog post about RobotsConf coming next week…
For more updates, be sure to follow us on Twitter at @CylonJS.
Creating Multiplatform Precompiled Binaries for Node.js Modules
It is always a high priority here at The Hybrid Group to make Cylon.js, and all of the various Node.js modules that it depends on, easier to install and use.
Using some of the coolest npm modules for developing JavaScript robotics like node-serialport, node-opencv and gamepad often require compiling native extensions. Some of those modules also require platform specific native dependencies and libraries for OSX, Linux, or Windows.
This requires that the user of the modules have a development environment for compiling native code, and that is also is up to date, which is not always the case. We have come across this issue quite often, since several Cylon modules also have dependencies for these same npm modules. It is especially difficult when doing a workshop or hackathon, when many attendees do not have all the dependencies required to compile these native extensions.
This is why we have taken it upon ourselves to help provide precomplied binaries for all major platforms, for the modules that we use in Cylon that have native dependencies.
We accomplish this using node-pre-gyp, which provides a very solid process to set up packaging and publishing of precompiled binaries. Using node-pre-gyp with Continuous Integration (CI) tools like TravisCI (build for Linux and OSX) and AppVeyor (build for Windows platforms) allow us to automatically generate, package, publish and have binary packages available each time a new version of the module is released.
This post details everything that we do to setup these builds, so that other maintainers can make life easier for users that want to install one of these modules.
Setup and Auto-Generate the Binary Packages
This are the steps we follow to be able to auto-generate binary packages, so they can be installed and used by anyone.
- Add node-pre-gyp hooks and dependencies to your module.
- Make sure you can compile and package your binary dependencies.
- Set up a publishing mechanism (node-pre-gyp recommends AS3).
- Make sure you can publish the binary package.
- Set up CI tools to automatically autogenerate the binary packages on new releases.
- Add a Make task to make release and publish easier.
Test Compilation On All Platforms
This is probably the most crucial part, since you need to test compilation and packaging in all 3 platforms. Relying entirely on CI tools to accomplish this can make it painfully slow to test and make it work. Nobody should have to wait 30 minutes just see your build fail in Travis or AppVeyor!
It is almost always better to do this in a local machine first and take notes, then push to the CI tools for the final build, compile, test, package and publish steps.
Some recommendations to make this process smoother:
- Make it work locally on each platform first (VM or HW).
- Take notes on all dependencies you install, updates to Path and environment variables you set up.
- Check bindings.gyp for dependency details and Path hints.
- Keep both the
appveyor.ymlandtravis.ymlfiles up to date with your local process. - Only publish from CI tools after you confirm the module compiles correctly, otherwise you'll have to continuously delete the publish binaries for the same version.
- If CI build compilation fails, open a direct communication channel with them (forums, support), those guys can help a lot, they can even help you find the root cause if your local build fails.
Let's check how to set up everything using the CI environment for all platforms(Linux, Windows and OSX). We'll be using node-opencv module as an example since this was the one that presented the biggest challenge to set up.
For details on how to set up node-pre-gyp bindings and package.json binary section check the node-pre-gyp README. It is very good, easy to understand and filled with many important details and options.
Generating Linux Precompiled Binaries Using Travis CI
Linux is probably the easiest platform on which to set up pre-compiled binaries. In the case of OpenCV, we have to first make sure we have all required dependencies installed.
Let's go through the different sections of the .travis.yml file and I will give an explanation of what we are doing. Starting from the beginning of the file, here is the build config section:
# First we set up the the type of project, in this case node_js
language: node_js

# We also need to specify the node.js versions we want to build from,
# this is important because not all modules work with version 0.11 yet
# and we want to also create binaries for the different node versions.
node_js:
  - '0.10'
  - '0.11'

# What we'll be using to compile
compiler: clang

# Here we set up our secure env variables for AS3 publishing.
env:
  global:
  - secure: THE_VERY_LONG_SECURE_KEYS_FOR_PUBLISING
  - secure: THE_VERY_LONG_SECURE_KEYS_FOR_PUBLISING
The above code should be pretty straight forward. We are just telling Travis how our build should be configured, the type of project, the versions of Node.js, compiler and environment sensitive information.
Next we have our before_install section where we install the dependencies we need and also check if this build should publish binaries or not.
before_install:
  # This fixes a problem with apt-get failing later, see http://docs.travis-ci.com/user/installing-dependencies/#Installing-Ubuntu-packages
  - sudo apt-get update -qq
  # We install all dependencies for node-opencv using apt-get
  - sudo apt-get install libcv-dev
  - sudo apt-get install libopencv-dev
  - sudo apt-get install libhighgui-dev
  # Get commit message to check if we should publish binary
  - COMMIT_MESSAGE=$(git show -s --format=%B $TRAVIS_COMMIT | tr -d '\n')
  # Put local npm modules .bin on PATH
  - export PATH=./node_modules/.bin/:$PATH
  # Install node-gyp and node-pre-gyp so it is available for packaging and publishing
  - npm install node-gyp -g
  - npm install node-pre-gyp
  # Install aws-sdk so it is available for publishing to AS3
  - npm install aws-sdk
  # Figure out if we should publish
  - PUBLISH_BINARY=false
  # If we are building a tag then we need to publish a new binary package
  - if [[ $TRAVIS_BRANCH == `git describe --tags --always HEAD` ]]; then PUBLISH_BINARY=true; fi;
  # or if we put the string [publish binary] in the commit message
  - if test "${COMMIT_MESSAGE#*'[publish binary]'}" != "$COMMIT_MESSAGE"; then PUBLISH_BINARY=true; fi;
As you can see in the code above, installing the dependencies in Travis is pretty straight forward.
One thing to notice, is that we use the commit message or tag to set up an env variable that we'll then use to check if we should publish a new binary package with this commit, or not.
Next up is our install section where we make sure the module compiles correctly and we run tests.
install:
  # Ensure source install works and compiles correctly
  - npm install --build-from-source
  # test our module
  - npm test
  - node lib/opencv.js
We are using the before_script section to package and publish the binary.
Once you have the secure environment variables set up in your .travis.yml file (as we can see above), for details on how to set them up using the Travis gem check here.
before_script:
  - echo "Publishing native platform Binary Package? ->" $PUBLISH_BINARY
  # if we are publishing for this commit, do it
  - if [[ $PUBLISH_BINARY == true ]]; then node-pre-gyp package publish; fi;
  # cleanup
  - node-pre-gyp clean
  - node-gyp clean
Two things worth mentioning here. First, note that we check for the environment variable PUBLISH_BINARY that we set up earlier based on tag or commit message. This is how we know if we should publish at this time.
Secondly, we cleanup the compiled binaries after publishing so we can test the remote binary in the next block.
In the last section of the script, we make sure we can install from remote and print out the info for the binaries:
script:
  # if publishing, test installing from remote
  - INSTALL_RESULT=0
  - if [[ $PUBLISH_BINARY == true ]]; then INSTALL_RESULT=$(npm install --fallback-to-build=false > /dev/null)$? || true; fi;
  # if install returned non zero (errored) then we first unpublish and then call false so travis will bail at this line
  - if [[ $INSTALL_RESULT != 0 ]]; then echo "returned $INSTALL_RESULT";node-pre-gyp unpublish;false; fi
  # if success then we arrive here so lets clean up
  - node-pre-gyp clean

after_success:
  # if success then query and display all published binaries
  - node-pre-gyp info
Again we use the PUBLISH_BINARY env variable we set up in the before_install section. If we publish a new binary, then we install from the remote, to make sure the binary works as expected.
Finally we just print out all node-pre-gyp info about the binaries.
You can check the complete version of the .travis.yml file here.
Creating x86 32bit Binaries Using TravisCI
There is one catch when creating 32-bit binary packages, however.
By default, Travis does not have an x86 32-bit environment, so you have to install Node.js 32-bit and the appropriate libraries, and then use them to create the x86 package. We do this for node-serialport, let's take a look at the .travis.yml file:
- node-pre-gyp clean
# node.js v0.8 and above provides pre-built 32 bit and 64 bit binaries
# here we use the 32 bit ones to compile, pckage, publish and test 32 bit builds
- NVER=`node -v`
- wget http://nodejs.org/dist/${NVER}/node-${NVER}-${platform}-x86.tar.gz
- tar xf node-${NVER}-${platform}-x86.tar.gz
# enable 32 bit node
- export PATH=$(pwd)/node-${NVER}-${platform}-x86/bin:$PATH
# install 32 bit compiler toolchain
- if [[ "$platform" == 'linux' ]]; then sudo apt-get -y install gcc-multilib g++-multilib; fi
# try to compile in 32 bit mode
- if [[ "$platform" == 'linux' ]]; then CC=gcc-4.6 CXX=g++-4.6 npm install --build-from-source; else npm install --build-from-source; fi
- npm test
# if everything works correctly publish 32 bit build
- echo "Publishing x86 32bit Binary Package? ->" $PUBLISH_BINARY
- if [[ $PUBLISH_BINARY == true ]]; then node-pre-gyp package publish; fi;
As you can see, after cleaning up the build and compiled files, we then install node, the libraries, and all dependencies for x86 architecture.
The reason why we don't do this for node-opencv, is because OpenCV itself has a lot of OS dependencies, that currently we are unable to install in a AMD64 architecture.
In this case, what we can do is set up VM with Linux x86 32-bit and use it to manually publish the binaries. The complete .travis.yml file that we use in node-serialport can be found here.
Creating Binaries for OSX
Since Travis does not allow us to create builds for multiple OSs, we use a little hack to create the binaries for OSX.
What we do is create another branch osx-binaries where we put a slightly different .travis.yml file.
This branch will be used when cutting a release of the module to generate the OSX binaries. We do this by merging the latest release into this branch, and then just letting Travis do its work.
To simplify this process, we've created a make task that we run to cut a release. Let's go into detail about it below.
language: objective-c

env:
  matrix:
    - export NODE_VERSION="0.10"
    - export NODE_VERSION="0.11"
  global:
    - secure: SECURE_ENV_VAR
    - secure: SECURE_ENV_VAR

before_install:
  # We uninstall nvm to take care of node.js version
  - git clone https://github.com/creationix/nvm.git ./.nvm
  - source ./.nvm/nvm.sh
  # We use the env var defined in the build matrix to install the
  # appropriate nod.js version using nvm
  - nvm install $NODE_VERSION
  - nvm use $NODE_VERSION
  # We use brew to install all dependencies
  - brew tap homebrew/science
  - brew update
  - brew install opencv
    # get commit message
  - COMMIT_MESSAGE=$(git show -s --format=%B $TRAVIS_COMMIT | tr -d '\n')
    # put local node-pre-gyp on PATH
  - export PATH=./node_modules/.bin/:$PATH
  - npm install node-gyp -g
    # install node-pre-gyp so it is available for packaging and publishing
  - npm install node-pre-gyp
    # install aws-sdk so it is available for publishing to AS3
  - npm install aws-sdk
    # figure out if we should publish
  - PUBLISH_BINARY=false
    # if we are building a tag then publish
  - if [[ $TRAVIS_BRANCH == `git describe --tags --always HEAD` ]]; then PUBLISH_BINARY=true; fi;
    # or if we put [publish binary] in the commit message
  - if test "${COMMIT_MESSAGE#*'[publish binary]'}" != "$COMMIT_MESSAGE"; then PUBLISH_BINARY=true; fi;
  - platform=$(uname -s | sed "y/ABCDEFGHIJKLMNOPQRSTUVWXYZ/abcdefghijklmnopqrstuvwxyz/")

install:
  # ensure source install works
  - npm install --build-from-source
  # test our module
  - npm test
  - node lib/opencv.js

before_script:
  - echo "Publishing native platform Binary Package? ->" $PUBLISH_BINARY
  # if publishing, do it
  - if [[ $PUBLISH_BINARY == true ]]; then node-pre-gyp package publish; fi;
  # cleanup
  - node-pre-gyp clean
  - node-gyp clean

script:
  # if publishing, test installing from remote
  - INSTALL_RESULT=0
  - if [[ $PUBLISH_BINARY == true ]]; then INSTALL_RESULT=$(npm install --fallback-to-build=false > /dev/null)$? || true; fi;
  # if install returned non zero (errored) then we first unpublish and then call false so travis will bail at this line
  - if [[ $INSTALL_RESULT != 0 ]]; then echo "returned $INSTALL_RESULT";node-pre-gyp unpublish;false; fi
  # there is no need for 32bit binaries on Mac OSx since those machines are ancient

after_succese:
    # if success then query and display all published binaries
  - node-pre-gyp info
Here are a few things to notice from the .travis.yml file for the OSX build. We configure the build to use objective-c, so Travis creates the build in an OSX environment. We also pass along the NODE_VERSION variables to env matrix, so we can check and install the appropriate node.js version using nvm.
Lastly, we use brew to install all required dependencies.
Generate Windows Precompiled Binaries Using AppVeyor
Of all the 3 major platforms, Windows is probably the hardest to compile native extensions for. Sometimes it requires huge downloads and library installs, just to be able to compile a small native extension.
Fortunately, the team over at AppVeyor have it figured out, and are a great help when working with Windows precompiled binaries.
As I mentioned at the beginning, and above all true for Windows environments, I recommend to first setting up everything locally on a Windows computer, otherwise figuring out compilation issues directly in AppVeyor might take you a really long time.
I'll go through the appveyor.yml file and describe everything we are doing so you can replicate it on your Windows dev environment.
Let's get into it. First, the build configuration section.
# environment variables
environment:
  node_pre_gyp_accessKeyId:
    secure: SECURE_ENV_VAR
  node_pre_gyp_secretAccessKey:
    secure: SECURE_ENV_VAR

# The dependencies we need are only available in the unstable version of the server, we need them to build node-opencv
os: unstable

# This does not actually create builds with different windows architectures
# It is mainly for MS Visual Studio reference
platform:
  - x64
In the code above, we set up secure variables in the same way as we did with Travis. You can check the process to do that here.
We also need to tell Appveyor what version of the Windows Server OS we want to use. In this case, it is indispensable to use the unstable version, since our dependencies require libraries
only available there.
In the next section we use Chocolatey to install OpenCV using the command choco install opencv to install the package.
You can check the package details here: Chocolatey OpenCV. Once OpenCV is installed we
set up the PUBLISH_BINARY using the git tags or COMMIT_MESSAGE as we did before and install nodist so we can later install different
node.js versions.
install:
# Use Chocolatey to install OpenCV
- cmd: ECHO "INSTALL OPENCV:"
- cmd: choco install OpenCV
- cmd: ECHO "APPVEYOR_REPO_COMMIT_MESSAGE ->"
- cmd: ECHO %APPVEYOR_REPO_COMMIT_MESSAGE%
- cmd: SET COMMIT_MSG="%APPVEYOR_REPO_COMMIT_MESSAGE%"
- cmd: SET PUBLISH_BINARY=false
- cmd: git describe --tags --always HEAD > _git_tag.tmp
- cmd: SET /p GIT_TAG=<_git_tag.tmp
- cmd: ECHO "LATEST LOCAL TAG:"
- cmd: ECHO %GIT_TAG%
- cmd: ECHO "APPVEYOR REPO BRANCH/TAG:"
- cmd: ECHO %APPVEYOR_REPO_BRANCH%
- cmd: DEL _git_tag.tmp
# If we are building a tag commit we set PUBLISH_BINARY to true
- cmd: IF x%APPVEYOR_REPO_BRANCH%==x%GIT_TAG% SET PUBLISH_BINARY=true
# Or look for commit message containing `[publish binary]`
- cmd: IF not x%COMMIT_MSG:[publish binary]=%==x%COMMIT_MSG% SET PUBLISH_BINARY=true
- cmd: ECHO "Env Var PUBLISH_BINARY:"
- cmd: ECHO %PUBLISH_BINARY%
# Install nodist so we can use it to install node.js versions later
- cmd: git clone https://github.com/marcelklehr/nodist.git c:\nodist 2>&1
- cmd: SET PATH=C:\nodist\bin;%PATH%
- cmd: SET NODIST_PREFIX=C:\nodist
The next section is probably the most crucial. We set nodist to update and install 64-bit version of node stable, and then
set the path to be able to find all the dependencies we need and that we previously installed. In this case we also need
GTK, MinGW and MSys.
before_build:
- cmd: SET ARCH=x64
- cmd: SET NODIST_X64=1
- cmd: call nodist update
- cmd: call nodist stable
- cmd: npm install -g node-gyp
- cmd: SET APP_PATH=%CD%
- cmd: IF EXIST C:\OpenCV* CD C:\OpenCV*
- cmd: SET OPENCV_ROOT_PATH=%CD%\opencv
- cmd: CD %APP_PATH%
- cmd: SET OPENCV_DIR=%OPENCV_ROOT_PATH%\build\%ARCH%\vc12\bin
- cmd: SET PATH=%cd%\node_modules\.bin\;C:\MinGW\bin;C:\GTK\bin;C:\msys\1.0\bin;%OPENCV_DIR%;%PATH%
- cmd: SET PKG_CONFIG_PATH=C:\GTK\lib\pkgconfig
# Here we need to copy the opencv.pc file from the repo into PKG_CONFIG_PATH
# trick part is to check for the vc12 folder and use that one
- cmd: copy .\utils\opencv_x64.pc C:\GTK\lib\pkgconfig\opencv.pc
One of the things that caused most problems when trying to compile in Windows was that PKG_CONFIG_PATH was not set up correctly, so we set it up pointing to the correct location SET PKG_CONFIG_PATH=C:\GTK\lib\pkgconfig.
Still no luck! We were not able to compile, due to missing libraries and headers. We started looking for them, and checking they existed where they were supposed to be. They were in the supposedly correcct locations, so something else must be missing.
We finally found out the real reason for the missing libraries by checking bindings.gyp, we found out node-gyp was looking for an opencv.pc file, that was supposed to be inside PGK_CONFIG_PATH, but even when we set up the path to the pkgconfig folder it was not finding it, turns out the directory did not contain an opencv.pc file, and this file was nowhere to be found.
The opencv.pc file contains all the cflags, versions, library and header locations, pretty much what we needed for node-gyp to find all dependencies, so we wrote one ourselves with the correct CFlags and library locations for the OpenCV version we just installed using Chocolatey, the opencv.pc file looks like this.
# Package Information for pkg-config
opencv_prefix=C:/OpenCV249/opencv/build/x64/vc12
exec_prefix=${opencv_prefix}/bin
libdir=${opencv_prefix}/lib
includedir=C:/OpenCV249/opencv/build/include

Name: OpenCV
Description: Open Source Computer Vision Library
Version: 2.4.9

Cflags: ${includedir} ${includedir}/opencv
Libs: ${libdir}/opencv_core249 ${libdir}/opencv_imgproc249 ${libdir}/opencv_highgui249 ${libdir}/opencv_ml249 ${libdir}/opencv_video249 ${libdir}/opencv_features2d249 ${libdir}/opencv_calib3d249 ${libdir}/opencv_objdetect249 ${libdir}/opencv_contrib249 ${libdir}/opencv_legacy249 ${libdir}/opencv_flann249 ${libdir}/opencv_core249
We can check the that pkgconfig cflags and libraries are setup correctly using the following commands:
pkg-config --libs opencv
pkg-config --cflags opencv
If after creating the opencv.pc file and running the commands you do not see all the libraries then your PKG_CONFIG_PATH is not set correctly.
Once that was set up node-gyp was no longer complaining and halting compilation and we were finally able to compile locally, it was time to replicate this configuration in AppVeyor, by making appveyor copy opencv.pc file from the utils/ folder in the repo to the appropriate Windows location.
In retrospect figuring that out, was probably the most time consuming part of this process.
Checking the node-gyp bindings.gyp file helped a lot and shed some light into what was the part that we were missing so our native extensions could compile in Windows.
The rest of the process goes pretty much the same as the Linux and OSX one. We compile, package and test, and then if everything is good and no errors found/triggered, we publish the binary package. Then we repeat the process for the x64 32- bit binary.
Here's the rest of the appveyor.yml file:
build_script:
  - cmd: ECHO "BUILDING x64 binary package:"
  # Make sure to use to pass --msvs_version=2013 to the npm install command
  # otherwise some bindings and libraries might now be available, an error will trigger
  - cmd: npm install --build-from-source --msvs_version=2013
  - cmd: npm test
  - cmd: node lib/opencv.js
  - cmd: ECHO "PUBLISH x64 binary package:"
  - cmd: npm install aws-sdk
  - cmd: IF %PUBLISH_BINARY%==true (node-pre-gyp package publish 2>&1)
  - cmd: node-pre-gyp clean
  - cmd: node-gyp clean
  - cmd: npm uninstall -g node-gyp
  - cmd: rmdir /q /s node_modules
  # Delete the pkgconfig\opencv.pc file with the AMD64 references
  - cmd: DEL C:\GTK\lib\pkgconfig\opencv.pc

after_build:
  - cmd: SET ARCH=x86
  - cmd: SET OPENCV_DIR=%OPENCV_ROOT_PATH%\build\%ARCH%\vc12\bin
  - cmd: SET PATH=%OPENCV_DIR%;%PATH%
  - cmd: SET NODIST_X64=0
  - cmd: call nodist update
  - cmd: call nodist stable
  - cmd: npm install -g node-gyp
  # Copy the pkgconfig\opencv.pc file with the x86 references
  - cmd: copy .\utils\opencv_x86.pc C:\GTK\lib\pkgconfig\opencv.pc
  - cmd: ECHO "BUILDING x86 binary package:"
  # Make sure to use to pass --msvs_version=2013 to the npm install command
  # otherwise some bindings and libraries might now be available, an error will trigger
  - cmd: npm install --build-from-source --msvs_version=2013
  - cmd: npm test
  - cmd: node lib/opencv.js
  - cmd: ECHO "PUBLISH x86 binary package:"
  - cmd: npm install aws-sdk
  - cmd: IF %PUBLISH_BINARY%==true (node-pre-gyp package publish 2>&1)
  - cmd: node-pre-gyp clean
  - cmd: node-gyp clean
  - cmd: rmdir /q /s node_modules

on_success:
  # test installing from binary package works
  - cmd: ECHO "ON SUCCESS:"
  - cmd: ECHO "Try installing from binary:"
  #- cmd: IF %PUBLISH_BINARY%==true npm install --fallback-to-build=false
  - cmd: npm install --fallback-to-build=false
  # Print Available Binaries
  - cmd: node-pre-gyp info

test: OFF

deploy: OFF
As you can see the process is pretty similar to the one use in Travis CI, after taking care of the Windows specifics.
Using a Make Task to Cut a Release
As mentioned above we use a Make task to cut releases, package and publish binaries.
This task will do the following for you:
- Generate new tags based on package.json version number
- Push tags to Github
- Checkout into
osx-binariesbranch - Merge
masterintoosx-binaries - Push
osx-binaries - Checkout master
- Finally it will run
npm publish
This takes away the bother of having to manually merge and push to generate OSX binaries. The Make task and Makefile look as follows:
VERSION := $(shell node -e "console.log(require('./package.json').version)")

.PHONY: default release

# Add a default task so we don't release just because someone ran 'make'
default:
        @echo "Did you mean to release a new version?"
        @echo "If so, run 'make release'."

release:
        @echo "Tagging release $(VERSION)"
        @git tag -m "$(VERSION)" v$(VERSION)

        @echo "Pushing tags to GitHub"
        @git push --tags

        @echo "Switching to osx-binaries branch"
        @git checkout osx-binaries

        @echo "Merging master into osx-binaries"
        @git merge --no-ff --commit -m "Merge master into osx-binaries [publish binary]" master

        @echo "Pushing osx-binaries"
        @git push

        @echo "Switching to master branch"
        @git checkout master

        @echo "Publishing to NPM"
        @npm publish ./
With this we will make sure the binaries for all platforms and architectures will be generated each time a new version is released.
Which Modules Have Precompiled Binaries?
So far we've added (or are working on) pre-built binaries for the following:
Already using pre-built binaries:
Pending PRs to be merged:
Implementation in progress or waiting in the queue:
Conclusion
That was a rather long post, but has a lot of information that we've only learned the hard way. Hopefully, it will help the rest of the Node.js community have an easier time when developing and building Node.js modules that use native code.
For more updates, be sure to follow us on Twitter at @CylonJS.
Cylon 0.20.0 is out!
As part of our continued lead up to Cylon 1.0.0, we've just finished releasing Cylon 0.20.X.
This set of changes impact module developers more than users, but there's still some goodies in there to be found!
For a full changeset, see the compare page on GitHub.
For Application Developers
-
Browser & Mobile support: - Cylon.js now has full browser support, and can run on mobile devices too! We've even set up some examples for you! For more details, see our blog post that covers it in detail.
-
Log levels: - Cylon's logger now has log level support; and will automatically log anything over
infolevel. This can be customized with a configuration value. -
Logger configuration: - One of the last outliers, Cylon's Logger configuration has been relocated to
Cylon#config. For example:var CustomLogger = require('./custom-logger'); Cylon.config({ logging: { logger: CustomLogger, level: 'debug' } });
-
Test-Driven Robotics config changes: - when writing test-driven robotics, indicate you're in test mode through
Cylon#config:Cylon.config({ testMode: true }); -
Explicitly specify modules: - when creating a robot, you can explicitly tell Cylon which module it should attempt to load Drivers/Adaptors from:
Cylon.robot({
  name: 'testbot',

  connections: {
    myspark: {
      adaptor: 'myspark',
      module: 'cylon-spark'
    }
  },

  devices: {
    led: { driver: 'led', pin: 9, module: 'cylon-gpio' }
  },

  work: function() {
  }
});
This isn't necessary in most cases, as Cylon.js is typically smart enough to find the module automatically. However, if you are using a custom module, or a module with multiple adaptors, this may prove helpful.
For Platform Developers
-
Registry: - this is the biggest change in
0.20.0, and significantly simplifies how Cylon submodules are registered with Cylon. When writing the main file for a Cylon module, the previous syntax was something like the following (usingcylon-sparkas an example):var Cylon = require('cylon'), GPIO = require('cylon-gpio'); var Adaptor = require("./spark-adaptor"), Driver = require("./spark-driver.js"), VoodooSpark = require("./voodoospark-adaptor"), module.exports = { adaptor: function(args) { if (args.adaptor === 'spark') { return new Adaptor(args); } else if (args.adaptor === 'voodoospark') { return new VoodooSpark(args); } }, driver: function(args) { return new Driver(args); }, register: function(robot) { Cylon.Logger.debug("Registering Spark adaptor for " + robot.name); robot.registerAdaptor('cylon-spark', 'spark'); robot.registerAdaptor('cylon-spark', 'voodoospark'); robot.registerDriver('cylon-spark', 'spark'); GPIO.register(robot); } };
This is a bit messy, and involves loading up Cylon + Cylon-GPIO to just to register the module. Here's the new syntax:
var Adaptor = require("./spark-adaptor"),
    Driver = require("./spark-driver.js"),
    VoodooSpark = require("./voodoospark-adaptor"),

module.exports = {
  adaptors: ['spark', 'voodoospark'],
  drivers: ['spark'],
  dependencies: ['cylon-gpio'],

  adaptor: function(args) {
    if (args.adaptor === 'spark') {
      return new Adaptor(args);
    } else if (args.adaptor === 'voodoospark') {
      return new VoodooSpark(args);
    }
  },

  driver: function(args) {
    return new Driver(args);
  }
};
Now, the module's supplied Adaptors and Drivers are presented as simple arrays, with a dependencies array to indicate which other modules are supported by this one.
For example, cylon-firmata indicates that cylon-gpio and cylon-i2c are dependencies.
This change hopefully reduces clutter for module developers, and makes it easy to see at a glance what a Cylon module provides for adaptors and drivers.
-
extraParamsremoval: - all params passed in the connection/device configuration objects are now kept there, instead of put intoextraParams.// for the connections hash: connections: { spark: { adaptor: 'spark', accountToken: 'YOUR_ACCOUNT_TOKEN', deviceId: 'YOUR_DEVICE_ID' } } // Cylon 0.19.0 - Spark adaptor constructor: opts.extraParams.accountToken // => 'YOUR_ACCOUNT_TOKEN' // Cylon 0.20.0 - Spark adaptor constructor: opts.accountToken // => 'YOUR_ACCOUNT_TOKEN'
More Hardware Support
And as always, no Cylon.JS release would be complete without additional hardware support. We're now up to 31 platforms, adding the following:
-
cylon-blefor Bluetooth Low-Energy peripherals -
cylon-powerupfor the PowerUp glider (powered bycylon-ble) -
cylon-wiced-sensefor the WICED Sense BLE tool from Broadcom -
cylon-mqttfor communicating using the [MQTT protocol]
For more updates, be sure to follow us on Twitter at @CylonJS.
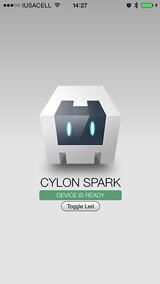
Running Robots From Your Browser With Cylon.js
Ever thought about controlling robots directly from your browser? With the latest release of Cylon.js, we make it easy to control robots and connected devices from your own browser-based and mobile applications.
For now, in-browser support is limited to a few modules, due to browser sandboxing. JS running in a normal browser can't, for instance, talk directly to Bluetooth or a serial port. You CAN however do this if you are running Cylon.js in a Chrome application.
However, if a Cylon.js browser communicates with hardware over the network, it will work from within any browser without a hitch.
For example, the cylon-ardrone, cylon-spark, cylon-leapmotion, cylon-hue and more are supported already.
In this example, we're going to blink the LED on a Spark Core from Cylon.js running in a regular browser.
Create
In a new folder, use NPM to install cylon-spark:
$ npm install cylon cylon-spark
Once that's installed copy this Cylon.js program to script.js.
Add your Spark Core's accessToken and deviceId.
You can get both of these from Spark's Build tool:
-
accessToken: In the Build tool, click on the Settings cog in the bottom-left corner to find your access token. -
deviceId: After you have your Spark Core registered to your account through the Tinker app, click on the Cores section (just above the Settings cog) on the Build tool. Then, click on the arrow next to your core's name to get its device ID.
Make sure to add these to the script, or it won't work.
var Cylon = require('cylon');

Cylon.robot({
  connections: {
    spark: {
      adaptor: 'spark',
      accessToken: '[YOUR_ACCESS_TOKEN]',
      deviceId: '[YOUR_DEVICE_ID]'
    }
  },

  devices: {
    led: { driver: 'led', pin: 'D7' }
  },

  work: function(my) {
    every((1).second(), function() {
      my.led.toggle();
    });
  }
}).start();
Code in place, let's write a small HTML file (index.html) that'll host the script:
<!doctype html>
<html lang="en">
  <head>
  </head>

  <body>
    <script src="browser_script.js"></script>
  </body>
</html>
And that's it.
Compile
Now with the pieces in place, let's compile the Cylon.js program for browser use with the Browserify tool.
If you don't have it already, install it through NPM:
$ npm install -g browserify
Then, use it to compile the script:
$ browserify script.js -r cylon-gpio -r cylon-spark -o browser_script.js
Run
Now, just open index.html in your browser and your Spark's LED should start blinking.
Want more?
From here, the sky's the limit. If you want to get started on a more complex Cylon.js robot for use in the browser, we've created an example project on GitHub to get you started.
If that's not enough for you, you can also package Cylon.js scripts into Chrome Apps. We've created another example project repo to get you started on that front.
You can even include Cylon.js in your PhoneGap mobile app. Look for an upcoming blog post focusing on this, but for now here is an example of PhoneGap + Cylon.js
Check out our Browser Support guide for more information.
For more updates, be sure to follow us on Twitter at @CylonJS.
Winning the Dreamforce 500 With Cylon.js
Dreamforce 2014 was an amazing experience for the Cylon.js team from The Hybrid Group. A conference talk, daily workshops, and four days of booth demos made for a schedule requiring the stamina of robots. Of course, we brought plenty of those with us, as usual!
At a conference that featured keynotes by Hillary Rodham Clinton, Al Gore, Tony Robbins, will.i.am, and Neil Young, we were quite happy just to have made the bill, and so we prepared our most dynamic demos yet to bring our best.
Our booth was in the IoT DevZone, once again organized by the high-powered Reid Carlberg. We ended up in a great location, and were packed with people wanting to play our "Dreamforce 500" virtual racing game.
The "Dreamforce 500" combined Sphero robots, the Phillips Hue lighting system, the Pebble smartwatch, and of course Salesforce to create a virtual racing game, written using Cylon.js.
The game was a great way to showcase how powerful and flexible our technology stack is, by creating a full end-to-end solution that combined connected devices, wearable computing, and robots, in the form of a fun, playable game.
Each day of the conference, we led a featured workshop called "Connect Intel Edison to Salesforce In 60 Lines Of JavaScript Using Cylon.js". Thanks to our friends at Intel, we were able to bring a box of the just-released Intel Edison single board computers with us.
The lucky attendees were able to get a first look with a truely hands-on experience using the brand new Intel hardware. Every workshop we did was completely full, plus a standing room only crowd of observers, which was really gratifying.
We also gave a talk on Wednesday in the "Innovation Theater", featuring live demos of Salesforce connected drink dispensers and a delivery drone.
It was great to be able to share our vision of "Full Stack Robotics" and "The 10 Rules of RobotOps" with so many of you. Thanks for taking time out of your busy Dreamforce schedules to come hear us!
Thank you to the Dreamforce staff for all their hard work over the 4 days (plus setup and breakdown) of one of the world’s largest technology conferences. And thanks again to everyone who came to our talk, workshops, or booth. We appreciate it!
You can keep up with the ongoing adventures of Cylon.js on Twitter at @cylonjs.
With The New Cylon.js 0.19.0, You Can Be Fluent Too
Update: - we've updated the examples to use the newer version of the fluent syntax.
We've just finished cutting Cylon.js 0.19.0, another big step forward leading to our 1.0.0 release.
There are a number of exciting, yet potentially-breaking interface changes; particularly for module developers.
But don't fear!
We're here to let you know what these changes are and what else is new.
For Application Developers
-
Fluent syntax - Useful to those familiar with jQuery or similar frameworks. You can choose which syntax you prefer based on your specific application scenario, either the new fluent style, or the current declarative style. Here is an example of a Arduino-based robot, written in the fluent syntax:
var Cylon = require('cylon');

Cylon
  .robot()
  .connection('arduino', { adaptor: 'firmata', port: '/dev/ttyACM0' })
  .device('led', { driver: 'led', pin: 13 })
  .device('button', { driver: 'button', pin: 2 })
  .on('error', console.log)
  .on('ready', function(bot) {
    bot.button.on('push', function() {
      bot.led.toggle();
    });
  });

Cylon.start();
This is how the same example looks with the current declarative syntax:
var Cylon = require('cylon');

Cylon.robot({
  connections: {
    arduino: { adaptor: 'firmata', port: '/dev/ttyACM0' }
  },

  devices: [
    { name: 'led', driver: 'led', pin: 13 },
    { name: 'button', driver: 'button', pin: 2 }
  ],

  work: function(bot) {
    bot.button.on('push', function() {
      bot.led.toggle();
    });
  },

  error: function(err) {
    console.log(err);
  }

}).start();
See what we mean? You can now choose the best syntax for your preferred style of code. Have it your way!
-
Configuration with
Cylon#configure(obj). This method takes an object as an argument, and merges it with Cylon's interal configuration. It then returns the current configuration. -
API configuration has been moved to the
Cylon#configureblock.Cylon#api()will now start an API instance with the current configuration. -
Auto-start mode - Cylon can now automatically start robots for you, as soon as they're instantiated. To enable this behaviour, enable it in the configuration -
Cylon.config({ mode: 'auto' }). -
No more name collisions - Cylon will now automatically rename Devices, Connections, and Robots if they'd conflict with the name of an existing object.
-
Adjustable halt timeout - by default, Cylon will automatically hard-terminate if it can't gracefully shut down inside 3 seconds. This timeout is adjustable in config as
haltTimeoutin milliseconds.
For Platform Developers
-
Adaptor
#connect/#disconnect+ Driver#start/#haltmethods now take a callback. The#halt/#disconnectmethods must be implemented in Adaptor/Driver subclasses, and trigger the provided callback when they're done their own work. This is to help ensure Cylon can shut down efficiently and safely. -
Methods are automatically proxied from Adaptors -> Connections and Drivers -> Devices. You no longer have to manually provide an Adaptor commands array.
-
Driversubclasses will now receive a default interval of 1000ms. This is adjustable by users in the device configuration hash. -
Direct Adaptor access inside Drivers - inside Driver subclasses, instances will now have direct access to the Adaptor they're communicating with under
this.adaptor. -
For Test Driven Robotics (TDR) and inside the Robot class, testing mode is now triggered by
NODE_ENVrather than a global variable.
More Hardware Support
Of course, no Cylon.js release would be complete without some new hardware platform updates, so we've added support for the Phillips Hue wireless lighting system with cylon-hue, as well as updating cylon-spark to use the new Spark.js library with the Spark Core wireless microcontroller.
We are really excited about this big update to Cylon.js, and we hope you are too. It is now just that much easier to create robots and connected devices.
For more updates, be sure to follow us on Twitter at @CylonJS.
Cylon.js on Intel Edison
Team Cylon.js was at the Intel Developer Forum in San Francisco last week, and we got our hands on one of the new Intel Edison boards for the first time. We might have been a little skeptical after the hype of the initial Edison announcement at CES, but once we started working with it, within 24 hours we were very excited about the possibilities.
The Edison is a tiny System on Chip (SoC) board, that is intended to be the main processor for connected devices that include some intelligence inside. It includes dual-core Atom processors, 1GB of RAM, and built-in WiFi/Bluetooth LE, all on a single board with a tiny 70-pin Hirose "stacking connector".
The Hirose connector is one big clue to how Intel plans on the Edison being used: it is the base for a highly customized modular solution, that puts the Edison's GPIO, I2C, UARTs and other capabilities to work in a unique way. The Arduino-compatible breakout board for the Edison is just for compatibility sake. The much more interesting approach is that being used by Sparkfun, who are manufacturing a series of "blocks" which let you mix and match various individual capabilities.
Once you've prototyped everything, you would then manufacture a custom single board that uses only what you need for your embedded system. This is a very interesting way to approach modularity.
Thanks to the efforts of the Intel IoT team, there is a Linux image that includes everything you need for your code to access the various I/O capabilities of the various Intel boards. This is largely due to a compiled library called "MRAA", that is itself also open source.
We've just added support to Cylon.js for the Intel Edison, as well as updating our support for the Intel Galileo, so you can now use any of the GPIO and I2C devices that Cylon.js already includes, along with any of the many new devices that are being added all the time.
Here is a simple example, showing Cylon.js using the Intel Edison's GPIO for analog input using a potentiometer, and PWM output using an LED:
And here is the code:
var Cylon = require('cylon');

Cylon.robot({
  connections: {
    edison: { adaptor: 'intel-iot' }
  },

  devices: [
    { name: 'sensor', driver: 'analogSensor', pin: 0 },
    { name: 'led', driver: 'led', pin: 3 },
  ],

  work: function(my) {
    my.sensor.on('analogRead', function(val) {
      brightness = val.fromScale(0, 1024).toScale(0, 255) | 0;
      console.log('brightness => ', brightness);
      my.led.brightness(brightness)
    });
  }
}).start();
We've also added full support for I2C devices. Here is the same example, but using a BlinkM connected via I2C:
Here is the code:
var Cylon = require('cylon');

Cylon.robot({
  connections: {
    edison: { adaptor: 'intel-iot' }
  },

  devices: [
    { name: 'sensor', driver: 'analogSensor', pin: 0 },
    { name: 'blinkm', driver: 'blinkm' },
  ],

  work: function(my) {
    my.blinkm.stopScript();

    my.sensor.on('analogRead', function(val) {
      brightness = val.fromScale(0, 1024).toScale(0, 255) | 0;
      console.log('brightness => ', brightness);
      my.blinkm.goToRGB(brightness, brightness, brightness);
    });
  }
}).start();
We've provided instructions on how to get started with Cylon.js and the Intel Edison on our documentation page here. We've also updated the documentation for our Intel Galileo at here.
We're really excited about the Intel Edison, and we will be adding more support for hardware based on this new platform as it comes out.
Keep up with our ongoing adventures on Twitter at @cylonjs.
Cylon Takes Off on NodeBots Day
NodeBots Day was international this year, with over 25 locations spanning five continents and hundreds participating for the weekend of July 26th to the 27th. The Hybrid Group, creators of Cylon.js, were proud to be one of the sponsors. NodeBot experts helped others hack, solder, and 3D print their way to creating a force of fully functioning NodeBots to be reckoned with. From blinking lights to dog fights with quadcopter drones, JavaScript developers of all levels of experience got to use their powers to manipulate the machines.
NodeBots day was open to anyone who wanted to hack on hardware, build robots, or become a Maker. The end result allowed for JS developers the ability to control the real world through their robots.
NodeBots as an idea was first conceived by Chris Williams out of the increasing need for software to match hardware creation and control within the burgeoning Node.JS community. The goal to make programming robots and connected devices as easy as programming a webpage with JavaScript is now a reality with the help of Cylon.js.
People from around the world were able to meet-up and use Cylon.js to hack together on Arduinos, Rasberry Pis, ARDrones and any other platforms that only need more input to make something awesome!
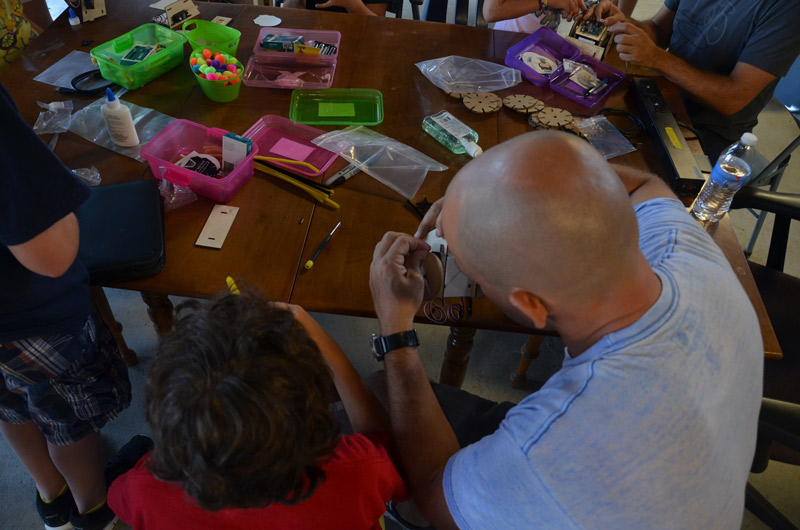
Cylon.js supported Norfolk's NodeBots Day event to great success! The Norfolk.js Team is a fast-growing, very active group of JavaScript developers that love all things JS. From young beginners to seasoned experts, everyone had the chance to collaborate and have fun with robots. In the morning, there was a robot building session, and in the afternoon there were robot battles giving way to a winner who carried away the honor as well as a prize.
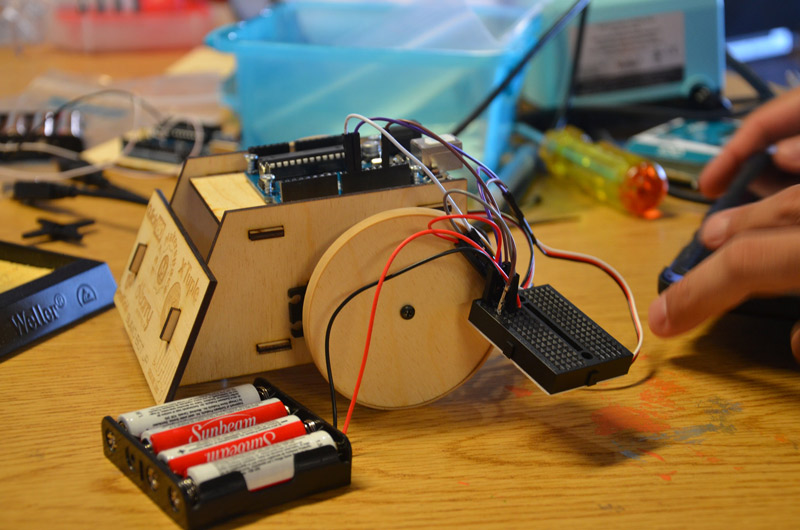
Thank you very much to the NodeBot organizers and participants from all around the world. We appreciate it, and look forward to next year.
You can follow along with our ongoing adventures on Twitter at @cylonjs.
Cylon.js Fun With The Arduino Yun
We've been working on adding support for the Arduino Yun for a while, and we've finally released it into the wild. If you are not familiar with this member of the Arduino family, it is a Single Board Computer (SBC) that runs Linux, and that also has a built-in microcontroller. The real fun with the Yun comes in putting the Yun's little OpenWRT Linux distro to use, making it run Node.js + Cylon.js, and then communicate with the Arduino side of the board.
It is kind of on the long side of setup processes, as far as setup processes for different Single Board Computers (SBC) go, but thankfully it is not that complex, and where's the fun of hacking if you just need to click the 'continue' button, right?
For projects that require Cylon.js to be run on the board itself, you have been able to use a Raspberry-Pi or a Beaglebone-Black for a while. Now you can also choose to use your Yun to its full extent and run Cylon.js on it as well. Let us not digress any further, we have full platform support and step by step guide here:
These instructions will help you setup the Yun to run Cylon.js and communicate with the Arduino, all on the same board!
Here's a small example of the Hello, World program of robotics, blink_led.js, running on the Linux side of the Arduino Yun using Cylon.js:
var Cylon = require('cylon');

Cylon.robot({
  connections: {
    arduino: { adaptor: 'firmata', port: '/dev/ttyATH0' }
  },

  devices: {
    led: { driver: 'led', pin: 13 }
  },

  work: function(my) {
    every((1).second(), function(){
      my.led.toggle();
    });
  }
}).start();
Happy hacking :-) !
Build something cool? Want to let us know? Just want to see what we're up to? Follow us on Twitter - @CylonJS
Control Robots From Your Pebble
Have you ever wanted to control robots from your wrist? This is now possible, thanks to Cylon.js support for the Pebble smart watch.
Using Cylon and a Pebble app that we have created called WatchBot app, you can very easily send notifications, receive events, and access accelerometer data.
How Does It Work?
Once you've loaded WatchBot onto your Pebble watch, the app can communicate directly with the Cylon API, and use this to send commands and receive events from your connected devices.

Get Started
Getting started with Cylon.js and Pebble is easy, all you need to do is install the cylon-pebble module:
$ npm install cylon cylon-pebble
Install Watchbot
With that done, download WatchBot from the Pebble App Store.

Configuration
Once you've got WatchBot installed, go to "My Pebble" on your smartphone's Pebble app. Once there, configure the following settings:
- robot name: leave this blank.
- robot api host: IP address of the computer that will be running the Cylon API.
- robot api port: port number for the Cylon API
- publish command: leave this blank
- message command: leave this blank
- accelerometer: leave this unchecked.
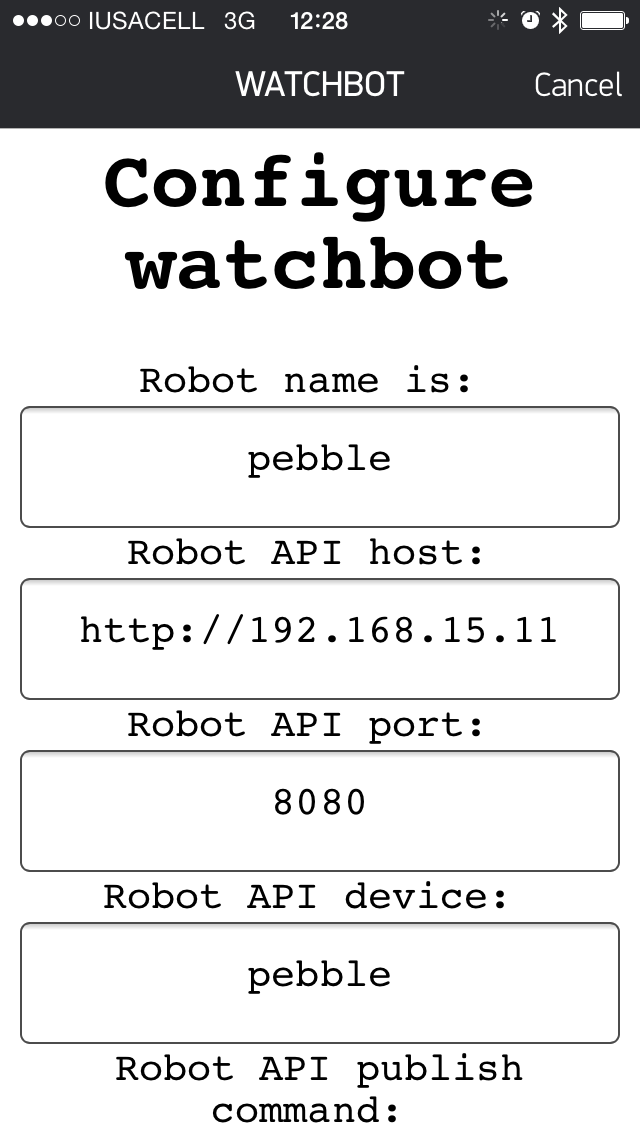
Examples
Here's a simple example of a Cylon robot your Pebble can talk to:
var Cylon = require('cylon');

Cylon.api({
  host: '0.0.0.0',
  port: '8080',
  ssl:  false
});

Cylon.robot({
  name: 'pebble',

  connections: {
    pebble: { adaptor: 'pebble' }
  },

  devices: {
    pebble: { driver: 'pebble' }
  },

  work: function(my) {
    my.pebble.send_notification("Hello Pebble!");

    my.pebble.on('button', function(data) {
      console.log("Button pushed: " + data);
    });

    my.pebble.on('tap', function(data) {
      console.log("Tap event detected");
    });
  }
}).start();
Re-open the WatchBot app on your Pebble (to update it with the new settings), and run this example. Your Pebble will now get a notification, and Cylon will log when your Pebble registers a button press or tap.
For more fun, let's track accelerometer data from the Pebble with Cylon:
var Cylon = require('cylon');

Cylon.api({
  host: '0.0.0.0',
  port: '8080',
  ssl:  false
});

Cylon.robot({
  name: 'pebble',

  connections: {
    pebble: { adaptor: 'pebble' }
  },

  devices: {
    pebble: { driver: 'pebble' }
  },

  work: function(my) {
    my.pebble.on('accel', function(data) {
      console.log(data);
    });
  }

}).start();
Before running this example, be sure to go to the WatchBot settings, turn accelerometer support on, and reopen WatchApp.
When you run this example, Cylon will begin logging your Pebble's accelerometer data to the screen.
This is just the start. Now your Pebble can be used to interact with any of the many other hardware and software platforms that Cylon.js currently supports. For more info about the Pebble support, please check out the docs. And check out the platforms page for info on the other hardware we support.
Build something cool? Want to let us know? Just want to see what we're up to? Follow us on Twitter - @CylonJS
Making Moves With Intel Galileo
We are happy to announce support for the Intel Galileo an Arduino compatible microcontroller/SBC (Single Board Computer).
The Galileo has the advantage of running on a Intel Quark SoC X1000 application processor, a 32-bit Intel Pentium brand system on a chip (SoC), and being able to run a bigger Linux image that lets you access the full Linux distro.
Cylon support is based on the bigger Linux image being installed on the Galileo, which lets you use the Galileo as an independent SBC device.
For the first release we have support for GPIO, digital I/O and analog I/O; and we are already working on the next release that will add I2C support, increasing the number of compatible devices supported by the Galileo.
You can check all the details and docs regarding Galileo support on Cylon.JS: Galileo.
Cylon.js makes developing for the Galileo easy and fun! Cylon.JS supports 21 different hardware platforms, with more being added all the time. Give us a shout on twitter and make sure to check the docs for more info on supported platforms in Cylon.JS.
The Cylon Nest
We are excited to announce support for the Nest Thermostat. With this new set of adaptors and drivers, you can allow your JavaScript robots, microcontrollers or single-board computers to interact with your Nest-supported smart home devices using Cylon.js.
We currently have two Nest-related drivers supported, nest-thermostat and
nest-home. nest-home allows you to check the status of all of your home's
smart devices at a glance. you can also check on more than one house, and set
your status to 'away' or 'home'.
Getting started with Cylon.js and Nest is easy, all you need to do is install the cylon-nest module:
$ npm install cylon cylon-nest
After that, follow these instructions to get a Nest developer account set up.
Once you're done with that, you can try your Nest integration out with the following code example (also made available in the cylon-nest examples):
var Cylon = require('cylon');

Cylon.robot({
  connections: {
    nest: { adaptor: 'nest', accessToken: 'ACCESS_TOKEN' }
  },

  devices: {
    thermostat: { driver: 'nest-thermostat', deviceId: 'DEVICE_ID' }
  },

  work: function(my) {
    my.thermostat.on('status', function(data) {
      console.log('The Thermostat at a glance:', data);
    });

    // We set the target temperature of the thermostat
    // and we check the change took place when the status
    // changes and the event gets triggered.
    my.thermostat.setTargetTemperatureC(24);

    every((60).seconds(), function(){
      // Alternatively to reading the status of the nest
      // we can call one of the read temp functions directly
      // on the thermostat.
      console.log('NEST ambient temp C:', my.thermostat.ambientTemperatureC());
      console.log('NEST ambient temp F:', my.thermostat.ambientTemperatureF());

      my.thermostat.read('away_temperature_high_c', function(data) {
        console.log("Away Temp High C on read callback -->", data);
      });
    });
  }
}).start();
Please note that to get this example to work, you'll need to provide an
access_token and device_id. These are both obtained when you set up
authorization, and are needed to communicate with the Nest API.
The nest-home driver can also be used in cool ways too! Imagine you're in
a different room from your Nest Thermostat, and the away state has kicked in.
You'd like to remind the Nest that you're still home, but you don't have
a smartphone on you.
As a fun weekend DIY project, you can hook up an Arduino such that a couple of LEDs tell you the away status of the nest in your home office, and pressing a button tells your Nest that you're still home, let's check the code:
var Cylon = require('cylon');

Cylon.robot({
  connections: [
    { name: 'arduino', adaptor: 'firmata', port: '/dev/ttyACM0' },
    { name: 'nest', adaptor: 'nest', accessToken: 'ACCESS_TOKEN' }
  ],

  devices: [
    { name: 'blue', driver: 'led', pin: 13 },
    { name: 'red', driver: 'button', pin: 12 },
    { name: 'button', driver: 'button', pin: 2 },
    { name: 'home', driver: 'nest-home', structureId: '' }
  ],

  work: function(my) {
    my.home.on('status', function(data) {
      console.log('Nest home at a glance:', data);
      if ('away' == my.home.away()) {
        my.blue.turnOff();
        my.red.turnOn();
      } else {
        my.red.turnOff();
        my.blue.turnOn();
      }
    });

    my.button.on('push', function() {
      my.home.away('home');
      console.log('nest thermostat `away` state set to home!');
    });
  }
}).start();
Hopefully running through these quick examples has given you some cool ideas of ways you can interact with your smart home. And if you build something awesome with Cylon and Nest, please let us know on Twitter!
If you want to see more of what can be done with Cylon.js and Nest, check out the rest of the cylon-nest examples! Also be sure to take a look at the 19 other different hardware platforms we currently support.
Announcing Full Tessel Support!
We are happy to announce full support for the Tessel JavaScript microcontroller! The Tessel is a new JavaScript powered microcontroller which runs your JavaScript programs directly on the board, so there's no need for an external PC to control the board. It features 4 build in LEDs, 1 button, and 5 banks of GPIO ports, i2c, spi and uart.
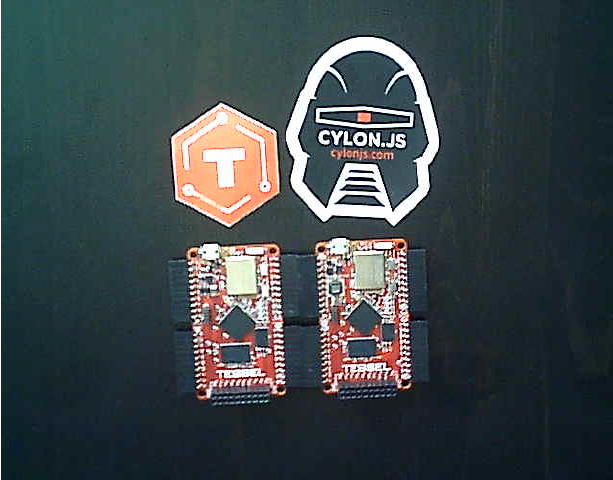
This picture of a Tessel & Cylon.js was taken from a Tessel using the Tessel Camera module, as controlled by Cylon.js itself. How meta!
Using Cylon.js on your Tessel gives you access to all of our existing GPIO and I2C driver support as well as the official Tessel Modules.
We currently support the following Modules:
- Accelerometer
- Ambient Light + Sound
- Audio
- Bluetooth Low Energy
- Camera
- Climate
- GPS
- Infrared
- Relay
- Servo
With more on the way!
Getting started with Cylon.js is as easy as:
- Follow the Tessel install instructions
$ npm install -g cylon-cli$ cylon generate tessel my-tessel-project$ cd my-tessel-project$ npm install$ tessel run blink.js
The supplied blink.js example uses the one of the Tessel's built-in LEDs.
var Cylon = require('cylon');

Cylon.robot({
  connections: {
    tessel: { adaptor: 'tessel' }
  },

  devices: {
    led: { driver: 'led', pin: 1 }
  },

  work: function(my) {
    every((1).seconds(), function() {
      my.led.toggle()
    });
  }
}).start();
Now for an example with user interaction! Here's a button example using the
built-in config button and a built-in LED. Copy this example into your
my-tessel-project directory as button.js
var Cylon = require('cylon');

Cylon.robot({
  connections: {
    tessel: { name: 'tessel', adaptor: 'tessel' }
  },

  devices: [
    { name: 'led', driver: 'led', pin: 1 },
    { name: 'button', driver: 'button' }
  ],

  work: function(my) {
    my.button.on('push', function() {
      my.led.toggle();
    });
  }
}).start();
And run with $ tessel run button.js. When you press the config button, the
light will toggle on and off, neat!
Now for something interesting. Here's an example using the built-in config
button, a built-in LED and the camera-vc0706 Camera module! Copy this
example into your my-tessel-project directory as camera.js
var Cylon = require('cylon');

Cylon.robot({
  connections: [
    { name: 'tessel', adaptor: 'tessel' },
    { name: 'tessel_A', adaptor: 'tessel', port: 'A' },
  ],
  devices: [
    { name: 'led', driver: 'led', pin: 1, connection: 'tessel' },
    { name: 'button', driver: 'button', connection: 'tessel' },
    { name: 'camera', driver: 'camera-vc0706', connection: 'tessel_A' },
  ],

  work: function(my) {
    my.camera.on('error', function (err) {
      console.log("Camera error: ", err);
    });

    my.camera.setCompression(0.4, function(err) {
      if (err) console.log("error setting compression: ", err);
    });

    my.button.on('push', function() {
      my.led.turnOn();
      my.camera.takePicture(function(err, image) {
        if (err) {
          console.log('error taking image', err);
        } else {
          // Name the image
          var name = 'picture-' + Math.floor(Date.now()*1000) + '.jpg';
          // Save the image
          console.log('Picture saving as', name, '...');
          process.sendfile(name, image);
        }
        my.led.turnOff();
      });
    });
  }
}).start();
This example will take a picture every time you press the config button
while the indicator LED will tell you when it's finished!
You can run this example with $ tessel run camera.js --upload-dir .
The --upload-dir . tells the Tessel to save the pictures to your current directory.
Cylon.js makes developing your Tessel applications easy and fun! Be sure to checkout our examples for each Tessel module here. As well as the 18 other different hardware platforms currently supported in Cylon.js.
Cylon 0.15.0 is Out!
Cylon 0.15.0 has just been released, as part of our run-up to 1.0.0. It has
a number of small changes, mainly effecting how modules are written. Don't
worry, there's still a lot of changes for end-users as well!
Here's a overview of the changes, but if you want to see more check out the compare view on GitHub.
-
Better halting: - Halting Cylon programs with Ctrl-C should now be more reliable, with a forced quit if the program can't gracefully stop within a couple seconds.
-
Removed 'connect' and 'start' events from Adaptors/Drivers: - due to how our startup works, by the time listeners could be set up for these events they were already fired.
-
Cleaner startup: - we now lean more on the async module to make sure Robot startup is as simple and efficient as possible.
-
Have some fun: - you can now optionally pass a
playblock when creating a Robot, rather thanwork. Internally, they behave the same, but all work and no play makes Jack a dull boy! -
Number#fromScale update: - the
fromScaleextension to Number will now cap results to the top or bottom of the scale. -
API Refactors: - our API has been updated to use Express 4 (previously we were using 3.5). Additionally, several catch-all routes have been replaced by middleware. Overall, this substancially downsizes the dependency tree for Cylon.
-
Commands is now an array, not a function: - previously, Adaptor/Driver
#commandswas a function that returned an array. For 0.15.0, we've eschewed that in favor of just directly accessing an array. -
find{Robot,RobotConnection,RobotDevice} gone: - we removed these previously used convenience methods from Cylon, in favor of manual lookup. To go with this change,
Cylon.robotsis now an object, not an array. Robots created withCylon.robotare stored in this object, using their name as a key. -
Utils (mostly) removed from global namespace: - Most of the utility functions have been removed from the global namespace, with the exceptions of
every,after, andconstantly, as well as the extensions toNumberwe provide (seconds,fromScale, etc.). All utilities can still be found under the Cylon.Utils namespace.
Contributors
A huge thanks to our contributors who made this release possible. And a special thanks to new contributors Andrew Nesbitt, Chris Boette, and Fábio Franco Uechi!
Documentation
We're constantly updating the Cylon docs to keep them up-to-date. You can find the latest info on the docs page.
Issues
If you find any issues with Cylon, please let us know! We try to be on IRC (#cylon on freenode) as much as possible, but if we're not around leave us a GitHub issue and we'll get back to you as soon as possible.
Cylon.js in Make Magazine!
We were on our way home from JSConf 2014 in sunny Florida, when the good news hit, that we were one of the things covered in Make Magazine's Robot Week series of articles. Yeah!

You can watch our video from MakerFaire as well read an interview by going to Make's blog post located at http://makezine.com/2014/05/31/building-robots-and-rockets-with-javascript/
You can also follow along with our ongoing robotic adventures on Twitter at @cylonjs.
Cylon.js At JSConf 2014
We had just enough time to recharge a few batteries from MakerFaire 2014, when we packed up Team Cylon.js and headed to JSConf 2014 in sunny Florida. JSConf is one of the centers of innovation (and fun!) in the JavaScript world.
Thanks to organizer Chris Williams and the ongoing efforts of the Nodebots team, there is already a well-established tradition of hardware hacking that has been going on. This means lots of cool people ready to take a look at what Cylon.js can offer to the community.
When we arrived for the makerspace setup day, we were astonished to find out that the amazing new NodeRockets project had already been built using Cylon.js, with our framework software controlling the capsule. Amazing! More on this incredibly cool project in a future post.
We gave our talk on Cylon.js the next morning, where we demoed Arduino, Tessel, Beaglebone Black, Sphero, ARDrone, OpenCV, Digispark & Neurosky. That was a lot to pack in!
The activity day was the day after our talk, and attendees were able to build either Nodebots, Nodeboats, Nodecopter, or Noderockets. There were people of every age wandering around, all having a great time hacking on their preferred robotic device. We know of several teams that used Cylon.js. For example, the Nodecopter team that placed second in that competition approached us with great excitment, telling us of their experience.
Thank you very much to the JSConf organizers and staff for having us be a part of the fun. We appreciate it, and look forward to next year.
You can follow along with our ongoing adventures on Twitter at @cylonjs.
CORRECTION: The capsule control software of the rocket was written using Cylon.js. The launcher part was built using Johnny-Five, as was pointed out by Raquel Vélez via Twitter.
Cylon.js Takes The Stage At MakerFaire
After our wonderful experiences at Scotland.js and a cameo at the Scottish Ruby Conference, we flew a long haul all the way to San Franciso airport heading to MakerFaire 2014! Hailed as the "greatest show and tell on Earth", we were greatly excited and honored to speak about Cylon.js on the Make:Electronics stage.
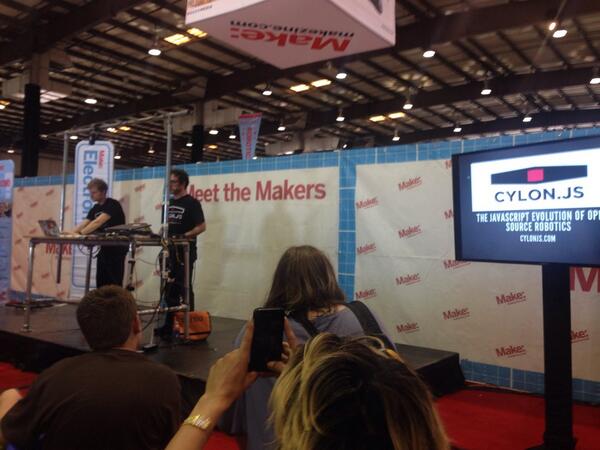
It was incredibly exciting to speak at MakerFaire's 9th year, after having attended it so many times. The crowd was really energetic, and we were ready for our close-up after having been on the road. We demoed Arduino, Tessel, Beaglebone Black, Sphero, ARDrone, & OpenCV.
We even were able to have family meet up with us to go around and enjoy the rest of the experience. Here is the youngest member of our crew getting ready to go on.

Thank you very much to the MakerFaire organizers for letting us take the stage and do our thing at such an illustrious event. We've hit the big time now!
Please follow our ongoing adventures on Twitter at @cylonjs.
Cylon.js In Scotland
We said farewell to Germany after NextBerlin 2014, then headed off to that learned city Edinburgh, Scotland for Scotland.js. Taking place in the remarkable museum Dynamic Earth, the conference featured excellent speakers, and a very interactive format with a question track taking place immediately after each of the talks.
During both days of the conference, we met friends both old and new. Talking to each other was a crucial element for the conference format, and we really enjoyed all the great conversations.
Our talk was fast-paced, since we have a lot of hardware. Luckily we've gotten it down to a highly choreographed level, so we were able to demo Arduino, Tessel, Beaglebone Black, Sphero, ARDrone, OpenCV, and Neurosky all in one talk!
Thank you so much to the conference organizers for inviting us to take part!
Want to stay up to date on our ongoing robot world tour? Follow us on Twitter at @cylonjs.
Robots Are The New Normal At NextBerlin
Our next stop on the robot world tour was NextBerlin 2014. Taking place as part of the massive Web Week Berlin, this conference connected business people from startups and large companies, media, and technologists from all over Europe.
Team Cylon.js had a special place to demo our JavaScript robots, and we spoke to many people while demoing a Leap Motion connection to a Sphero. Everyone wanted to play with it, and we were happy to spark a sense of fun and wonder to the business oriented crowd. Of course, it also happed to showcase the power of the platform too!

Over the 2 days of the conference, we met many people, gave a few interviews, and learned a lot about the European technology scene.
Thank you very much to the conference organizers for inviting us to Berlin!
You can follow our ongoing robot world tour on Twitter at @cylonjs.
Thingscon - Ich Bin Ein Cylon
The first leg of our spring tour to Europe began in Berlin at Thingscon. Taking place right before Web Week Berlin, the brand new conference brought together both international visitors and Berliner locals who are the early adopters in the new hardware scene rapidly forming in the city already becoming known for startups.
The conference opened up with a keynote from the insightful Brady Forrest, who is currently helping run Highway1, a new hardware incubator being launched out of PCH International. "Software still matters. Hardware companies, you still need software" he told the rapt audience. We quite agree!
Team Cylon.js closed the first day with a fantastic workshop. We brought our usual giant flight cases of gear, and with Spheros, Arduinos, and Leap Motion gestural controllers, we showed everyone how easy it is to control devices using JavaScript.
Thank you to the conference origanizers and the enthusiastic attendees for bringing us to Berlin!
Please follow our ongoing journey on Twitter at @cylonjs for updates and news.
National Robotics Week at the Robotics Society of Southern California
Wrapping up our National Robotics Week robot road show, we brought Cylon.js (http://cylonjs.com) back to SoCal to speak to the Robotics Society of Southern California. The venerable organization was established in 1989, and we were honored to be able to bring our JavaScript powered robots into the halls of academia.

The RSSC holds its meetings at the CSULB campus, which has a really great facility. We had just flown back from Boston where we'd introduced our new "10 Rules Of Robot Ops" site earlier this week. We used this as the theme for the talk. We had finished support for the Neurosky Mindwave Mobile EEG the previous week, and it was cool to incorporate Brain-Computer Interfaces (BCI) into our demos. We also showed Cylon.js running on one of the Tessel prototype boards, the new JavaScript-powered microcontroller. And of course, we had to show our ever popular version of Conway's Game of Life using Sphero robots.
Thanks to the Robotics Society of Southern California for inviting us to speak to their prestigious group, we had a great time sharing our latest work!
Please follow us on Twitter at @cylonjs for the latest updates and news, as the robot world tour continues.
Functional Robots With Wisp
Wisp is a really cool project for compiling a subset of Clojure syntax to JavaScript, without having to go through all the hoops that ClojureScript forces you through.
Wisp also compiles to plain JavaScript, without setting up a number of data structures and language idioms the way ClojureScript or other [lang]-to-JS compilers sometimes do. This lets you write Clojure with a fairly good idea of how it'll map to the resulting JavaScript.
For an example, I decided to convert the Cylon.JS cat toy example to it, just to get a feel for the process.
The example robot I'm converting hooks up to a Digispark with a couple servos and a Leap Motion. The robot uses hand positions picked up by the Leap Motion to control the servos. Simple enough.
It's pretty straight-forward JavaScript, so it shouldn't be too hard to convert. Now let's write an analogue in Clojure.
(def Cylon (require "cylon"))

; We're re-writing how the -> special form works here to allow for method
; chaining later on.
(defmacro ->
  [& operations]
  (reduce
  (fn [form operation]
    (cons (first operation)
          (cons form (rest operation))))
  (first operations)
  (rest operations)))

(def robot {
  connections [
    { :name "digispark" :adaptor "digispark" }
    { :name "leapmotion" :adaptor "leapmotion" :port "127.0.0.1:6437" }]

  devices [
    { :name "servo1" :driver "servo" :pin 0 :connection "digispark" }
    { :name "servo2" :driver "servo" :pin 1 :connection "digispark" }
    { :name "leapmotion" :driver "leapmotion" :connection "leapmotion" }]

  work (fn [my]
    (let [x 90
          z 90]
      (my.leapmotion.on
        :hand
        (fn [hand]
          ; wisp gives us this set! form to let us change variables,
          ; and also using the redefined -> macro we wrote earlier
          (set! x (-> hand.palmX (.fromScale -300 300) (.toScale 30 150)))
          (set! y (-> hand.palmY (.fromScale -300 300) (.toScale 30 150)))))

      (every
        100
        (fn []
          (my.servo1.angle x)
          (my.servo2.angle z)
          (console.log
            "Current Angle:"
            (my.servo1.currentAngle)
            ","
            (my.servo2.currentAngle))))))})

(.start (Cylon.Robot robot))
It still looks a fair bit like the original example, but it's clear we're not in Kansas anymore. We even had to write a macro to get method chaining working properly, but that's another cool thing: we wrote a macro, and it works.
The wisp binary has a couple modes; it can run files directly (wisp
robot.wisp), or will print a compiled version of code passed to STDIN.
Running this with cat robot.wisp | wisp > robot.js, we get a fairly decent
approximation of the original, which even comes with a generated sourcemap to
help with debugging.
var Cylon = exports.Cylon = require('cylon');
void 0;
var robot = exports.robot = {
        connections: [
            {
                'name': 'digispark',
                'adaptor': 'digispark'
            },
            {
                'name': 'leapmotion',
                'adaptor': 'leapmotion',
                'port': '127.0.0.1:6437'
            }
        ],
        devices: [
            {
                'name': 'servo1',
                'driver': 'servo',
                'pin': 0,
                'connection': 'digispark'
            },
            {
                'name': 'servo2',
                'driver': 'servo',
                'pin': 1,
                'connection': 'digispark'
            },
            {
                'name': 'leapmotion',
                'driver': 'leapmotion',
                'connection': 'leapmotion'
            }
        ],
        work: function (my) {
            return function () {
                var xø1 = 90;
                var zø1 = 90;
                my.leapmotion.on('hand', function (hand) {
                    xø1 = hand.palmX.fromScale(-300, 300).toScale(30, 150);
                    return zø1 = hand.palmY.fromScale(-300, 300).toScale(30, 150);
                });
                return every(100, function () {
                    my.servo1.angle(xø1);
                    my.servo2.angle(zø1);
                    return console.log('Current Angle:', my.servo1.currentAngle(), ',', my.servo2.currentAngle());
                });
            }.call(this);
        }
    };
Cylon.Robot(robot).start();
// [source map removed for formatting reasons]
I don't know if it's something I'd use in day-to-day yet, but Wisp seems like a really cool project for trying out some functional programming ideas in JavaScript.
I also think this could be a great learning tool for people who want to learn Clojure without getting a full JVM set up. It's easy enough to setup (installs through NPM), and generates clear results in a familiar language, allowing users to clearly see what their Clojure source is doing.
Release 0.12 Is For RobotOps
The sun never sets (or rises maybe?) here on Team Cylon.js. After many more lessons learned from you, our dear users, and especially after our great experience at Makerland, we've just released version 0.12 of our JavaScript framework for open source robotics, physical computing, and the Internet of Things.
You might have heard us talking about "RobotOps" or "DevOps for Robotics". We've completely rewritten our Command Line Interface (CLI), and it is now better faster and stronger than ever. First of all, we've put it into its own node module and repository. This makes it easier to use the Cylon.js CLI tools to flash Firmata on a few dozen Arduinos, scan serial interfaces for bluetooth devices, and much more. Even if you are not using Cylon.js for anything else, this is really useful!
We've also greatly improved our code examples, with both clean and fully-annotated versions. Many of the demos that we show in our road tour can be found here, and lots more besides. We think Cylon.js is the most powerful, flexible, and easy to use JavaScript framework for Node robotics. Our examples help show how you can be using it right now.
Please make sure to follow us on Twitter at @cylonjs for the latest updates. We hope you find our new release 0.12 really useful for helping handle your RobotOps needs, and making cool and useful things!
Making Waves At Makerland
Team Cylon.js has just returned from a remarkable trip to Makerland in Poland. Billed as a "theme park for makers", the really fun and informative 3 day conference lived up to its name. Held in Warsaw, Poland, at the ultra-modern Copernicus Science Center, Makerland packed in many kinds of robots, 3D printers, drones, submarines, and in our case, popsicle sticks.

We were leading the first major version of our brand new "Think Outside The Bot" workshop, that explores different modalities of human interaction with robotic devices. We used our favorite "minimum viable robot" the Sphero, along with 2 different control surfaces. Over the first 2 afternoons of the conference, we held continuous workshops. It was so popular, that many times we had a line of people waiting for the next opening. Thank you everyone for your patience!
The first workshop activity in the workshop, was each person constructed their own handmade wrist-mounted touch controller. Each workshop participant received a "Makey Button Kit" (inspired by the awesome MakeyMakey) with popsicle sticks, a pipe cleaner, copper foil tape, and high-ohm resistors. Programmed using the "Makey Button" driver, they were able to drive around Spheros by becoming "one with the machine" in a literal sense!
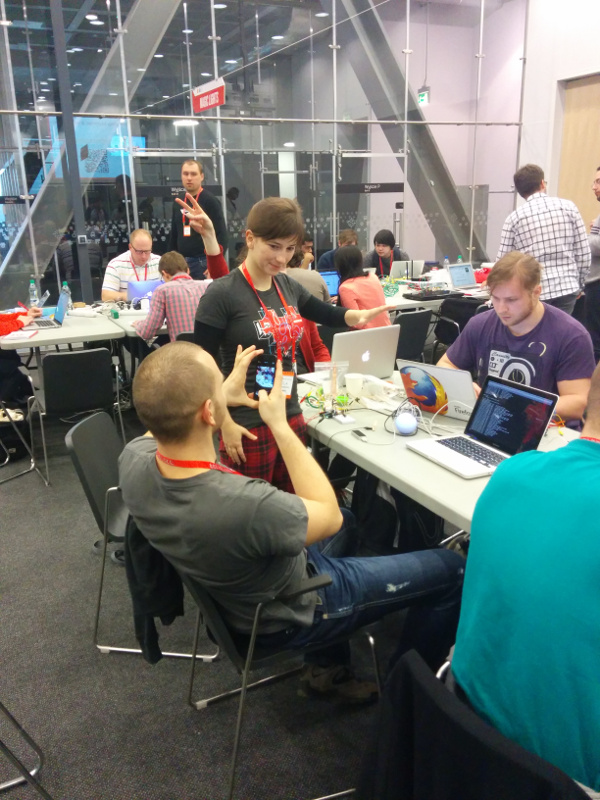
The second workshop activity used Leap Motion controllers to interact with the Spheros. The Leap Motion is the exact opposite end of the spectrum, having no wires at all, as opposed to people "wiring themselves in" to the Makey Button. Participants really enjoyed it, and also were able to think differently about Human Machine Interfaces (HMI) and all this thanks to the power and flexibility of the Cylon.js framework, along with how easy it is to program using JavaScript.
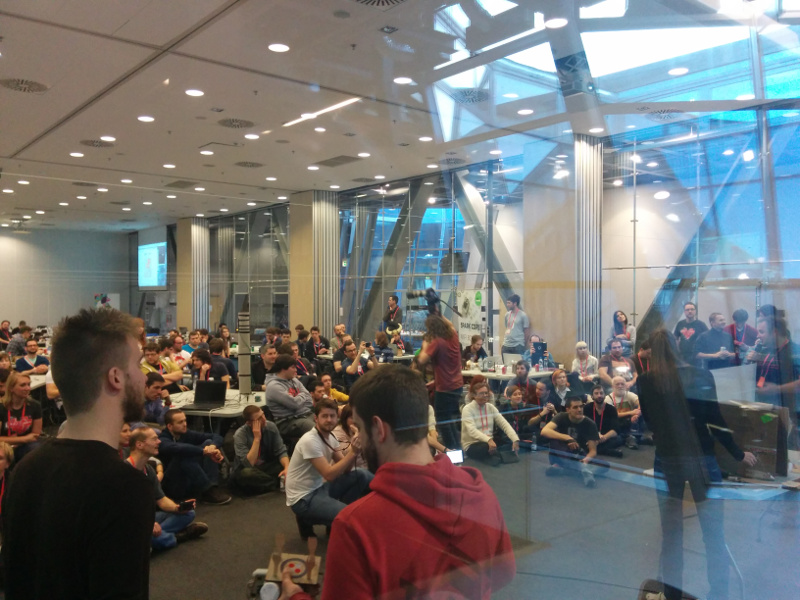
The last day of Makerland was a hackathon, and quite a few teams were using Cylon.js to get things done quickly. One comment we really appreciated from one of the teams, that created a labyrinth game. "We were doing direct Arduino programming, but when we switched to using Cylon.js, we got more done in 40 minutes, then the previous six hours, and even added the Leap Motion controller too." It was really fun to get to help so many people work on their projects, we really enjoyed it.
Thank you so very much to the organizers, speakers, other workshop leaders, sponsors, and most importantly everyone who attended the conference. Hope to see you next year!
This One Goes To 0.11 Of Pure JavaScript
Immediately after our SCaLE 12x talk, Team Cylon.js made a big push forward, and we've released version 0.11 of our JavaScript framework for open source robotics and the Internet of Things. The major focus of this release has been refactoring the core into pure JavaScript, away from the CoffeeScript that we had previously been using.
There are a number of key reasons why we've gone to a pure JavaScript code base:
- Performance is better when the toolchain is simpler. Not only are we now using just JavaScript, we've also removed Grunt. So how are we running our builds? We're using
makenow, and we can run our tests in around 40ms. - When spelunking the code, there is less code to look thru and search thru to find what you need. Many programmers use search tools like awk or grep as a key part of their workflow.
- Debugging easier, especially when looking for problems in broken tests.
- We do not really need any compiled language features of CoffeeScript. By writing better and more modular JavaScript, we can get many of the same benefits. Even when ES6 comes out, many lower-powered SoC devices might take a while to support all the new language features.
- We want to make it even easier for people to use Cylon.js and contribute back to it. Not as many people know CoffeeScript compared to plain JavaScript people. The open source project Discourse has had a lot of attention recently because of their switch.
We had already done the needed work to create a test suite to support such a serious refactor. Even with that prep, it took some dedicated effort, and a lot of coffee to remove all the CoffeeScript from core. But by keeping things green and clean, we made remarkable progress. We even refactored all of our adaptors and drivers into pure JavaScript too.
For those who adore CoffeeScript, you can still continue to develop your robotic applications that way. And we will continue to provide examples for both JavaScript and CoffeeScript. But for the purists among us, Cylon.js is now leaner and tighter than ever.
Make sure to follow us on Twitter at @cylonjs for the latest updates. We think that release 0.11 was a big step forward for the code and the project. We hope you agree. Please let us know what you think!
Tipping SCaLE12X
We were really pleased to present Cylon.js at the venerable Southern California Linux Expo (SCaLE 12x) now in its 12th year! SCaLE is one of the biggest regional open source conferences, and we were delighted to be on the same bill as of open source's biggest advocates, Lawrence Lessig, who gave the opening keynote.
Our own talk the next day was standing-room as well! That plus the very low ceiling, made it a real challenge for our daring test pilot during our demo. However, the show must fly on! We had a great time, and all of our equipment worked really well. We even got to include the latest platform that we've added, Skynet (http://skynet.im), the new machine to machine instant messaging protocol. Lots more on that coming soon…
Thank you to everyone at SCaLE12x, especially the conference organizers who do an amazing volunteer job. We appreciate it!
Intro Robeaux- A Universal User Interface To Robotic Devices
We've been hard at work since ng-conf last month here on Team Cylon.js, and we've just released version 0.10 of our JavaScript framework for robotics and the Internet of Things. We've added many powerful new features, as well as support for ever more hardware.
Last release, we added a web-based user interface to the Cylon.js API based on AngularJS (http://angularjs.org/). That idea was so powerful, that we've extracted it into a new separate library. Called Robeaux (http://robeaux.io), we think of it like a universal dashboard to all your robotic systems. Similar to how a router has built-in pages to help administer it, and verify connectivity. We're now using it within the newest releases of Cylon.js, Artoo (http://artoo.io), and Gobot (http://gobot.io).
The CLI that we added last release has been upgraded to support a lot more functionality. You can easily use the command line to scan for connected ports, pair with bluetooth devices, and more. We've also added commands to the cylon-firmata adaptor to install the needed firmware on your connected Arduino board. Likewise, the new cylon-digispark adaptor has built-in commands to install Little Wire on your Digispark board.
We've also added lots more hardware support. As just mentioned above, the Digispark USB-microcontroller now has an adaptor that supports all the Cylon.js GPIO and i2c drivers. We have added support for the PS3 Dualshock 3 controller in the cylon-joystick adaptor. And we've also added two more i2c devices, LCD display with i2c backpack, and the MPL115A2 digital barometer/thermometer.
The "MakeyButton" is our new GPIO driver, inspired by the wonderful MakeyMakey (http://makeymakey.com). It lets you connect a high Ohm resistor to any digital IO pin on an Arduino, Raspberry Pi, or any platform that supports GPIO. Using a very simple circuit with this resistor, you can use anything conductive to trigger your devices. Such as bananas, or conductive ink pens.
We've also upgraded our Sphero (http://gosphero.com) support, by making it easy (read: possible) to orient the Sphero's front direction. Yes, at last! This has probably been our number one asked for feature.
The entire documentation site for Cylon.js has been completely updated to better serve your needs. The API formatting and info has been very much improved, and we've also added more examples.
Please follow us on Twitter at @cylonjs for the latest updates. We're very excited about this new release. Please let us know what you think!
ng-robots! A Fun Robot Hackathon At The First ng-conf
We conducted the official robot hackathon at ng-conf, the first conference dedicated to AngularJS, that took place last week in Salt Lake City, Utah. It was perfect timing, given that the release of 0.9.0 of Cylon.js (http://cylonjs.com) our JavaScript open source robotics framework, had just added a AngularJS-based web UI to our API.
Over 120 people registered for the evening event that featured Sphero robots kindly provided by our friends at Orbotix. We also brought a bunch of our new Arduino Starter Kits, some Makey Makey's, and some Leap Motion controllers. Combining them together into something useful, fun, and/or creative had the participants completely captivated!
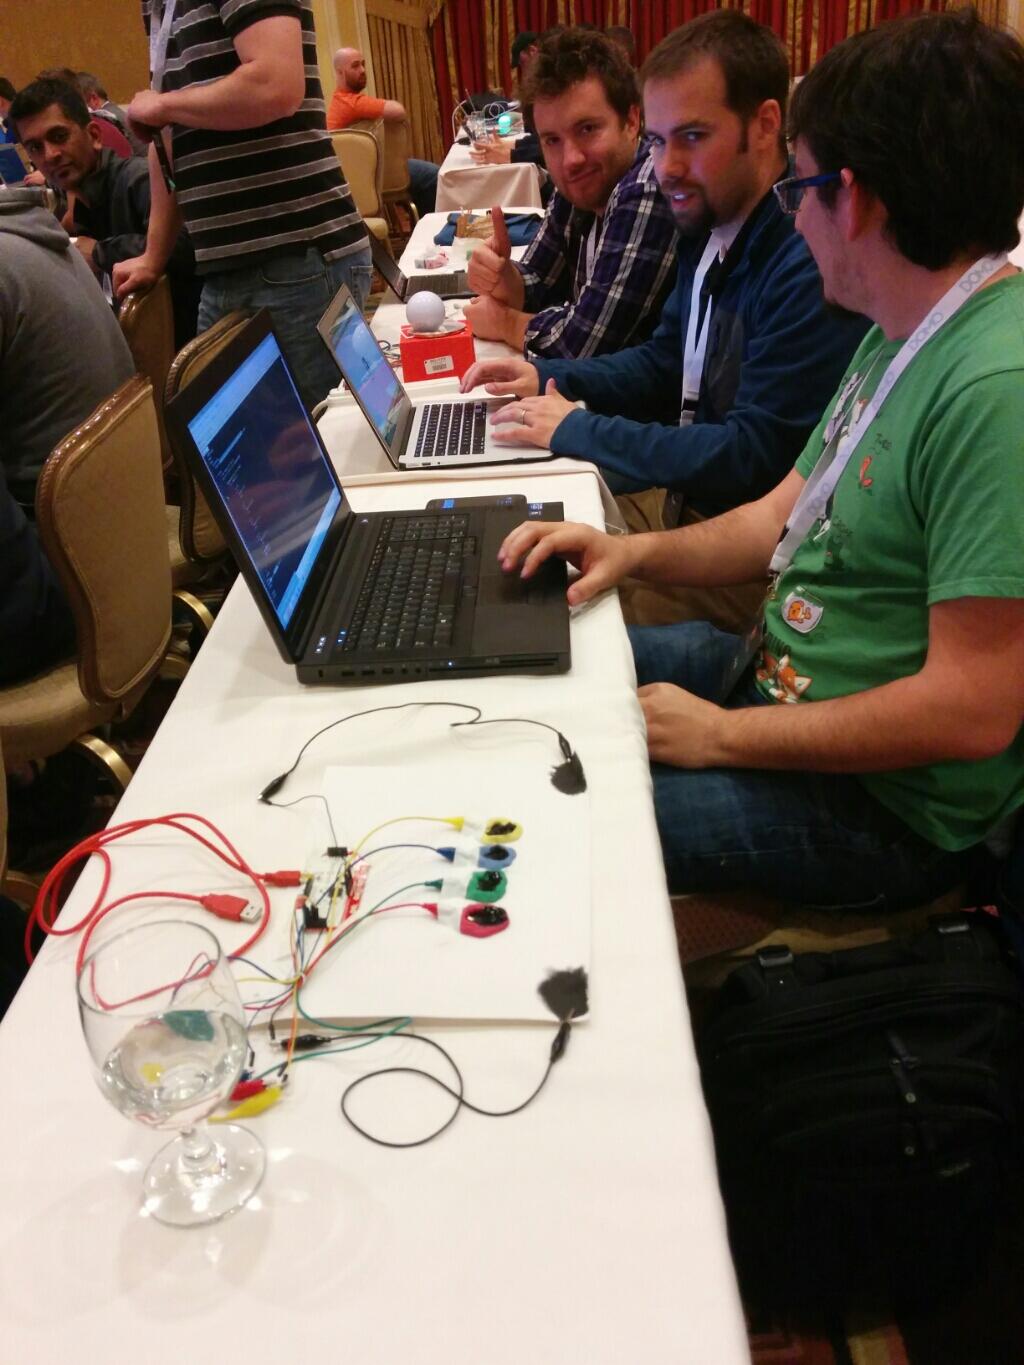
There were many teams that were able to complete something demoable during the few short hours of the hackathon, thanks in part to how easy it is to integrate different devices together using Cylon.js. The 3 winners got to walk away with Sphero robots of their own to keep playing with at home! It was a tough competition, but after lots of great demos, our judges were able to make a decision. The winners were:
- Team "Beam Me Up Spotty" with a "Simon"-like game that used the Sphero & Makey Makey.
- Team "Bananastand" that used Twitter tweets to control a Sphero in a "tug of war" called "Red Vs Blue".
- Team "Beerbot" that used drinking glasses of beer to control the color and movement of a Sphero.
The robot hackathon was a great way to start out the conference, and the attendees agreed that it was also a fun introduction to robotics. Thank you very much to Orbotix for providing the Sphero robots, to the organizers of ng-conf, and especially to all the people who took part.
Number 9! The Release In Which We Add A Web UX, More Platforms, and Tools
Our team is kicking off our first release of 2014, with the brand new version 0.9.0 of Cylon.js (http://cylonjs.com), the powerful JavaScript robotics framework based on Node.js. This release adds a web-based UI to our API, support for 3 more platforms, and a big upgrade to our command line tools.
First of all, the new Cylon user interface. Wouldn't it be great to be able to browse to a web page, and check on the status of your running robots, and even send them commands? Now you can, with our shiny new single-page web-based user interface written using AngularJS, that is now built right in to the Cylon API! The great thing is that it uses the same RESTful and web sockets calls that you can use to control your robotic minions over the web. Yes, of course you can command entire swarms of robots using Cylon.js!
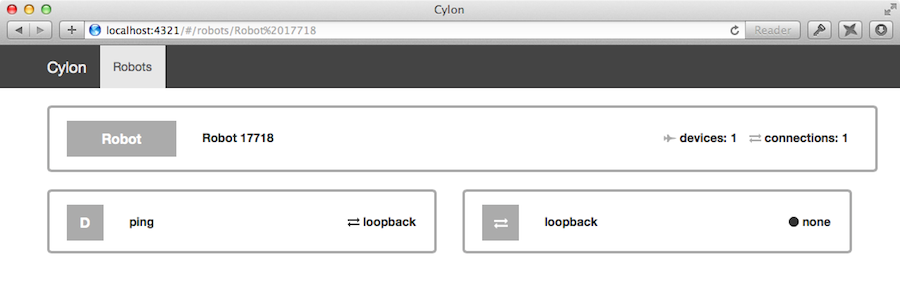
We've now added cylon-joystick an adaptor for USB joysticks, along with a driver that supports the Xbox 360 controller. This is only the first of several joystick drivers that we will be adding soon. We've also added cylon-keyboard an adaptor and driver for standard keyboard control of your robots. And perhaps most excitingly, we now have cylon-opencv, adaptor and drivers for OpenCV support, which is a powerful open source platform for computer vision.
This new 0.9.0 release also adds a powerful set of command line utilities. Each Cylon.js adaptor module can also add new commands that are specific to that platform. This CLI add-in capability just makes it that much easier to handle your "RobotOps" needs. We will be adding lots of platform specific utilties now that we have this capability. We have also been continuing our work to make it easy for anyone to add support for new hardware platforms. The cylon generate adaptor command now uses the latest and greatest code that incorporate our best practices for adaptor development.
Please let us know how you like the new release, and anything we can do to improve. We're here to help!
UPDATE: We pushed 0.9.2 to accomodate a checksum error pointed out by a user. Thanks!
Release 0.8.0 Makes 10 Platforms
After plenty of effort and a lot of help from our friends, we've just released version 0.8.0 of Cylon.js (http://cylonjs.com) the powerful new JavaScript robotics framework based on Node.js. This release brings us up to 10 different hardware and software platforms that we support! Even simultaneously!
From single board Linux computers such as the Raspberry Pi and BeagleBone Black, to next generation wireless micro-controllers such as the Spark, to gestural controllers such as the Leap Motion, we've been working hard to make it easy for you to develop multi-hardware robotics and physical computing solutions using Cylon.js. We have also been working just as hard on making it easy for anyone to add support for new hardware platforms quickly.
With the new 0.8.0 release, we've mostly locked down the core interfaces that will lead us down the road to 1.0. This will help all our collaborators and implementors, especially those who are working to add new hardware platform support. Thanks for helping us get all this sorted out, especially everyone at RobotsConf.
We've also done a lot to add to our documentation. Among many upgrades, we've got a new examples page, with both pure JavaScript, as well as literate CoffeeScript versions of all our code samples.
Please let us know anything we can do to make it easier and better to develop solutions. we're here to help!
RobotsConf Was Remarkable
Team Cylon.js got back a few days ago from the first ever RobotsConf last week. The brainchild of the influential Chris Williams aka @VoodooTikiGod of JSConf renown, RobotsConf was planned to be the first conference to bring open source software developers in and have them leave as new hardware makers.
Unlike a "normal" conference, the format for RobotsConf was to have just a few sessions to inspire creativity and provide some background on the first day, and then devote the rest of the conference to actually making things. Teams of language/subject matter experts (such as ourselves) had been invited to come and help everyone implement whatever it was they wanted to over the the 2 days of the conference. At the end, there would then be a "science faire" where everyone would get to show off their creations, and the "experts" would then judge the "winners". Very fun!
This would be one of the defining characteristics of RobotsConf: the culture of fun and openness. It was delightful collaborating and interacting with so many people. Running around helping alongside the various team members of the @nodebots and @nodecopter teams, along with so many other brilliant humans. It was almost like a music festival attitude of jamming, but of hardware hacking, everyone excited to see what each other were doing.
Thanks to a generous group of sponsors, fantastic hardware kits given to each attendee. It included a Leap Motion controller, which was one of the most popular devices used at the conference. Our team had pushed an adaptor for cylon-leapmotion a week before the conference, which really helped a lot of people get started quickly. Special thanks for the shout out during the Leap Motion team's workshop talk!
The kits also included a brand new Spark Core kit, among the first given to anyone! The Spark team brought some of the first shipment of devices from their success Kickstarter campaign directly to RobotsConf. Team Cylon took that as a challenge, and we were able to push an adaptor (cylon-spark) within 24 hours.
Lastly, the kits packed in an Arduino Uno and a bunch of sundry wires, cables, breadboards and stickers. You always need stickers!
The conference had a dedicated hardware hacking room, with stations setup for soldering, robotics, 3-D printing, laser cutting, wearable computing and more. Not to mention gigantic piles of components, breakout boards, sensors, legos, and googly-eyes that were available for people to use on the projects they were building at the conference. This stop motion video of the first day captures a lot of the tremendous energy and enthusiam that everyone had at the conference.
Next to the hardware hacking room was the drone hacking room with 50 ARDrones ready for flight. Many people came thru and tried their code on programmatic flips, as well as even more impressive aerial stunts. Not all landings were smooth, but no humans were hurt in the process.
We also had 30 Sphero robots thanks to our friends at Orbotix, plus some Crazyflie Nanodrones, a Roomba, and a few other specialized devices. Everything that Team Cylon.js had brought was available for people to "check out" library-style to use on their science fair robotics projects. Quite a few people "rolled" thru, and one of the winners did some really cool things with 2 Spheros and a Leap Motion.
Another of the science faire winners was 12-year-old genius @MakerSylvia and her team. This video shows her flying an ARDrone controlled by a Leap Motion, and then using a Spark to release something while in mid-flight. And she was even sporting one of our Cylon.js t-shirts too. We're so proud! Here is a brief video showing her demo.
Thank you so very much to everyone who took part in RobotsConf. It was incredibly fun and inspiring, and we cannot wait for the next one!
Dreamforce Means Connected Devices Are A Thing
As mentioned in our last blog post, we had a team demonstrating Cylon.js at the Dreamforce conference in San Francisco last week. At over 130,000 people registered, it is one of the largest tech conferences in the world! We had received a special invitation to be part of the first Connected Device Lab which was a unique location within the conference dedicated to important companies in the emerging "Internet of Things".
The first day of the conference, we "unleashed" cylon-force, an open-source adaptor that lets you connect a Cylon.js program to a Salesforce connected application. While many companies are still talking about the future, our hardworking team of humans and robots is already building the platform.
Our team showed a demonstration that we called the "Robot Economy". We had some Sphero robots bounce around inside an enclosure, and every collision we counted as a virtual dollar earned. Like a robotic "fight club". Cylon.js would then upload that to a Salesforce connected application we nicknamed the "First Galactic Bank of Sphero". The sales totals we would then push to a Pebble smart watch, to a small app we had programmed using the new Pebble SDK 2.0 Beta.
In other words, we demoed Cylon.js combining Pebble wearable tech, Sphero connected devices, and a Salesforce line of business application. Live. As you might imagine, Dreamforce attendees went crazy! The future is already here, dear friends.
Because we had so many hours of back to back demos (10+ hours a day!!!), we ended up demoing for thousands of people. Not kidding.
But that was not enough for our intrepid team. The last 2 days, we raised the level, and added a Crazyflie nanocopter into the mix. Whenever we flew the Crazyflie, we pushed data into the Salesforce connected app using our open source software. We had set up a "perimeter" of Spheros, and turned them red to warn the humans whenever the quadcopter was in flight, or green when the drone would land. We also pumped some of the telemetry info into the Pebble smart watch. The Dreamforce team was kind enough to let us out in front of the entire Connected Device Lab in the mornings before too much traffic made us retreat to the booth. First connected Salesforce drone? Yes!
Thank you very much to Reid Carlberg and everyone else at the Salesforce team who ran the Dreamforce Connected Device Lab, for a job well done. We appreciated being part of such a monumental event, and it should seem obvious now to everyone that devices are now a "thing".
Dreamforce Is Coming!
We're really excited because next week is Dreamforce, and Team Cylon will be there in "full force" as it were! We have a workspace in the Developer Zone at the Connected Device Lab on the second floor of Moscone West, and we're also leading a workshop on the opening day of the conference. Both will include lots of Sphero fun thanks to our friends at Orbotix. We will have a bunch of great giveaways too!
But don't be fooled, we're talking serious business, even if it comes in a rolling package. We will show you how easily you can use Cylon.js and Force.com together to integrate all kinds of devices that provide real-time business information. Cylon.js unleashes the power of JavaScript and Node.js to help build the Internet of Things, and we will be using Spheros in a fun way, to teach developers how they can start making use of these new technologies.
At our workshop, as well as over the course of the conference, we will show people how to use Cylon.js and Force.com together to integrate devices, using the Sphero 2.0 as our "minimum viable robot". Dreamforce is one of the largest technology conferences on Earth, and we are very honored and excited to be a part of it. If you are attending the conference, the session page is here. See you in San Francisco!
Welcome, Cylon.js
Welcome to the next era of open source robotics! This blog is where we will discuss new and interesting developments on Cylon.js (http://cylonjs.com) the new JavaScript robotics framework based on Node.js, as well as anything else interesting to the robot community at large.
We first introduced Cylon.js to the world at the Los Angeles JavaScript meetup last month, held appropriately at Idealab in Pasadena, CA. Yes, the same Pasadena where the legendary Jet Propulsion Laboratory (JPL) controls NASA robots currently on Mars. It was a great chance to share our work with the local community, and we were really excited and grateful for the wonderful response.
Since then, our team has been working hard on the project, adding more hardware support, and we have so much more coming. We're really excited about where the Cylon.js project is going, and how we can use the power of JavaScript and Node.js for open source robotics. Please give Cylon.js a try, and help us make it the easiest, most flexible, and most powerful framework in JavaScript for robotics and physical computing.
Network


Posts
- Cylon.js Off And Rolling In 2016
- Cylon.js 1.2.0 - Logging and Timing and BLE! Oh my!
- Cylon.js 1.1.0 - The Big Cleanup
- Hello, Node Bebop Drone
- Cylon.js featured in Wired
- Cylon.js 1.0.0 is here!
- Using Socket.io With The Cylon.js API
- Cylon 0.22.0 - A New Year's Release
- Cylon 0.21.0 is out!
- Creating Multiplatform Precompiled Binaries for Node.js Modules
- Cylon 0.20.0 is out!
- Running Robots From Your Browser With Cylon.js
- Winning the Dreamforce 500 With Cylon.js
- With The New Cylon.js 0.19.0, You Can Be Fluent Too
- Cylon.js on Intel Edison
- Cylon Takes Off on NodeBots Day
- Cylon.js Fun With The Arduino Yun
- Control Robots From Your Pebble
- Making Moves With Intel Galileo
- The Cylon Nest
- Announcing Full Tessel Support!
- Cylon 0.15.0 is Out!
- Cylon.js in Make Magazine!
- Cylon.js At JSConf 2014
- Cylon.js Takes The Stage At MakerFaire
- Cylon.js In Scotland
- Robots Are The New Normal At NextBerlin
- Thingscon - Ich Bin Ein Cylon
- National Robotics Week at the Robotics Society of Southern California
- Functional Robots With Wisp
- Release 0.12 Is For RobotOps
- Making Waves At Makerland
- This One Goes To 0.11 Of Pure JavaScript
- Tipping SCaLE12X
- Intro Robeaux- A Universal User Interface To Robotic Devices
- ng-robots! A Fun Robot Hackathon At The First ng-conf
- Number 9! The Release In Which We Add A Web UX, More Platforms, and Tools
- Release 0.8.0 Makes 10 Platforms
- RobotsConf Was Remarkable
- Dreamforce Means Connected Devices Are A Thing
- Dreamforce Is Coming!
- Welcome, Cylon.js
