Intel Galileo
Repository| Issues
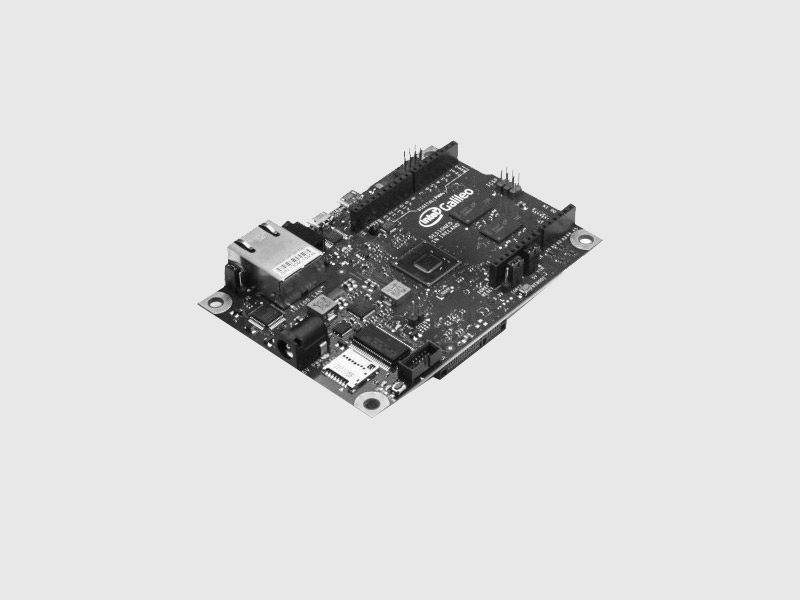
The Intel Galileo board is a microcontroller board based on the Intel Quark SoC X1000 application processor. It is intended to be compatible with shields designed for the Arduino Uno R3 or above.
For more info about the Galileo platform click here.
How To Install
Setting up your Intel Galileo
In order to use cylon-intel-iot on your Galileo, you need to install the Intel IoT linux boot image onto an sd card.
You can download the latest image here.
For Windows hosts you can follow the instruction for flashing your sd card image here.
For Mac or Linux hosts, it's as easy as extracting the image from the downloaded archive and executing the command
$ sudo dd if=/path/to/iot-devkit-latest-mmcblkp0.direct of=/dev/sdX bs=1M && sudo sync
where /dev/sdX is the location of your sd card. For help determing the location of your sd card, consult the appropriate guide for your OS below.
OS X Users
To prepare your SD card for flashing on OS X, you need to find out it's drive name and eject the volume.
To find the name, use the built-in diskutil utility:
$ diskutil list
/dev/disk0
  #:                       TYPE NAME                    SIZE       IDENTIFIER
  0:      GUID_partition_scheme                        *500.3 GB   disk0
  1:                        EFI EFI                     209.7 MB   disk0s1
  2:                  Apple_HFS Macintosh HD            499.4 GB   disk0s2
  3:                 Apple_Boot Recovery HD             650.0 MB   disk0s3
/dev/disk1
  #:                       TYPE NAME                    SIZE       IDENTIFIER
  0:     FDisk_partition_scheme                        *15.7 GB    disk1
  1:             Windows_FAT_32 NO NAME                 15.7 GB    disk1s1
According to this, our SD card is found at /dev/disk1.
Before you flash it with the above dd command, use diskutil to eject the existing volume (disk1s1):
$ diskutil unmount /dev/disk1s1
Linux Users
To prepare your SD card for flashing on Linux, you need to find the device location of your SD card. An easy way to determin the location is by filtering the /dev/ directory for new storage devices. Before you plug in your SD card, execute the following ls command
$ ls -l /dev/sd*
brw-rw---- 1 root disk 8,  0 Sep 16 21:48 /dev/sda
brw-rw---- 1 root disk 8,  1 Sep 16 21:48 /dev/sda1
brw-rw---- 1 root disk 8,  2 Sep 16 21:48 /dev/sda2
brw-rw---- 1 root disk 8,  5 Sep 16 21:48 /dev/sda5
You can see that I only have one storage device /dev/sda. Now plug in your SD card and execute the ls command again
$ ls -l /dev/sd*
brw-rw---- 1 root disk 8,  0 Sep 16 21:48 /dev/sda
brw-rw---- 1 root disk 8,  1 Sep 16 21:48 /dev/sda1
brw-rw---- 1 root disk 8,  2 Sep 16 21:48 /dev/sda2
brw-rw---- 1 root disk 8,  5 Sep 16 21:48 /dev/sda5
brw-rw---- 1 root disk 8, 16 Sep 17 17:46 /dev/sdb
brw-rw---- 1 root disk 8, 17 Sep 17 17:46 /dev/sdb1
brw-rw---- 1 root disk 8, 18 Sep 17 17:46 /dev/sdb2
You can see from this output that I now have a new storage device /dev/sdb. That is the location of my SD card, so in this instance the /dev/sdX in our dd command will be /dev/sdb.
After the image has been flashed to your sd card, install the sd card into the Galileo, connect it to your local network and power it up!
Now you're ready to install MRAA and Cylon.
Install MRAA
After you have flashed your Intel board and connected it to a network, you must now install the latest version of the Intel MRAA library. In order to update MRAA you simply log into your Intel board, through ssh or the uart serial connection, and follow the steps here.
Install Cylon
Once you have flashed your Intel board with the latest firmware as well as updated MRAA,
you will now install cylon-intel-iot. To do this you must be
logged into the board, through ssh or the uart serial connection, and execute the
following command
$ npm install cylon-intel-iot
Once cylon-intel-iot has been installed , you're ready to start programming!
How To Use
var Cylon = require('cylon');

Cylon.robot({
  connections: {
    galileo: { adaptor: 'intel-iot' }
  },

  devices: {
    led: { driver: 'led', pin: 13 }
  },

  work: function(my) {
    every((1).second(), function() {
      my.led.toggle();
    });
  }
}).start();
Drivers
Available drivers for the Galileo platform are listed below.